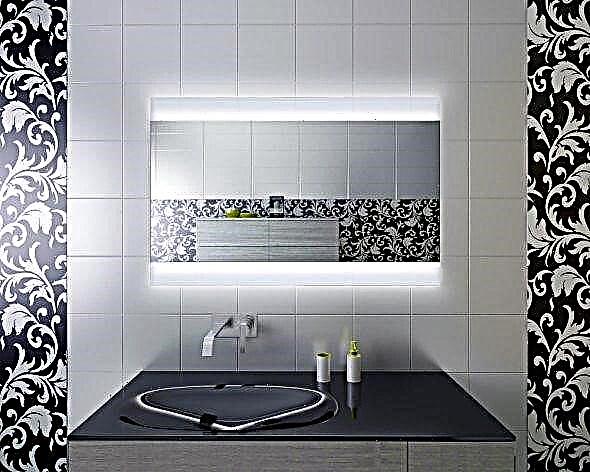
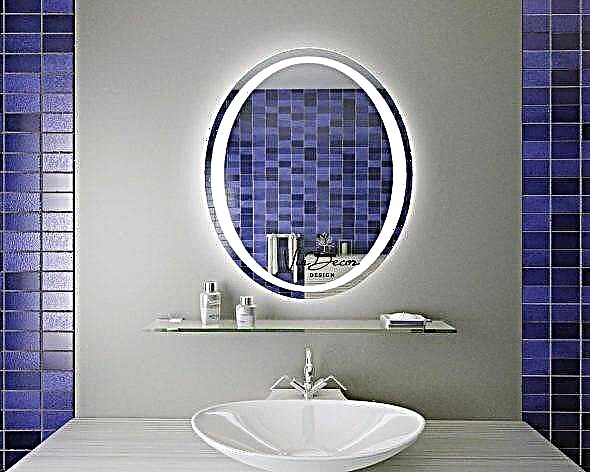
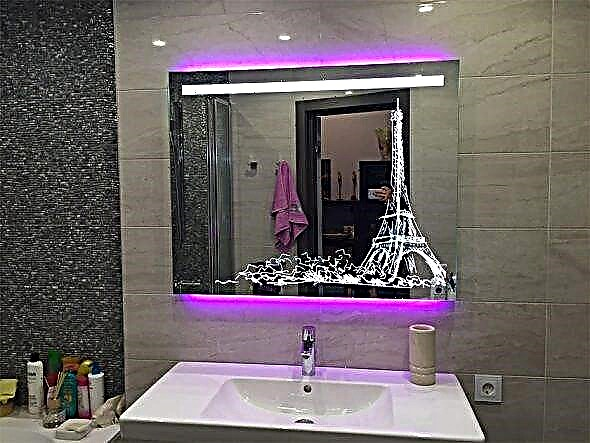
Such a non-trivial design move, like complementing the interior with a backlit mirror, will create a bright, eye-catching accent for the bedroom or bathroom.
The space is noticeably expanded due to the soft reflected glow. If desired, it is also possible to install sensors and several lighting modes. But first of all, consider a few simple instructions that describe how to make a luminous mirror. All the materials needed for this are easy to find and purchase. This is, first of all, the power supply and the tape itself, connecting wires and sealant (preferably silicone).
As you can see from the photo, thanks to the use of illumination, the room looks even brighter and more airy, and the interior does not seem heavier.
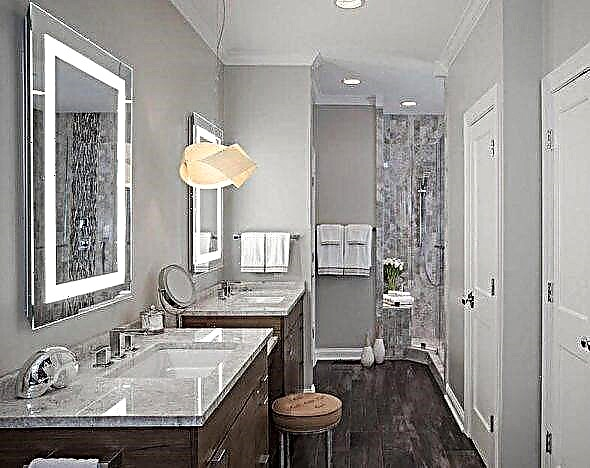
It may seem that making a mirror with LED backlight on your own is quite difficult, but this is not entirely true. A pleasant outcome of your efforts will be a more modern and complete look of the room.
Following simple instructions, you can make a mirror with backlight, creating an elegant luminous element of decor, which will definitely suit you in everything and fits perfectly into the interior.
Illuminated mirror device
After you have decided on the external requirements, it is worth considering how to provide the light - with ordinary bulbs or a tape of diodes. The second option is preferable, especially if you need a contour glow of an object of complex shape. The design for the backlight can be placed in a box or simply glued.
Choosing an LED Strip
Thinking about how to make a mirror with a backlight in the bathroom, you should first make sure that the diodes have a moisture-resistant coating. The more powerful the diodes, the brighter they will shine and the more electricity will go.
There are also diode tapes in which the color of the lighting can be switched. An important criterion is the power of the tape power supply. To calculate it, multiply the power of one meter (usually 4-8 watts) by the length of the tape.
In order to make the mirror illuminated with an LED strip, you must:
- Fix the tape on the mirror with double-sided tape.
- Solder the wires to the LED strip, observing the polarity. If necessary, seal joints with sealant. Home-made mirror lighting is ready. Additional light sources are not required, which means that you can fix it almost anywhere. A properly mounted design will work efficiently over time.
- Fix the power supply unit outside the bathroom and connect it, paying attention to the need to ground the unit casing.
How to cut an LED strip yourself
Understanding how to make a do-it-yourself mirror with your own hands is impossible without knowledge of the rules for working with LED strip.
It is divided into many segments. Usually manufacturers mark with a line places where disconnection is possible. If there is no marking, you can independently calculate the contact pads between which a cut is possible.
When cutting ribbons with waterproofing, after connecting it is necessary to treat the location of the contact pads with silicone sealant.
How to make a mirror with led lights in the box
- It is necessary to fix the mirror to the frame, which may be a plastic base or a box of timber. You should immediately consider the way in which the mirror will be attached to the wall. The plastic base is glued to the back of the mirror, the wooden box is attached with screws through pre-drilled holes.
- The next step is the installation of a backlit mirror. It is necessary to place an LED strip on the outside of the prepared frame and install the power supply inside the frame.
- Next, attach the tape to the power supply. To do this, the wire from the unit must be led outside the frame.
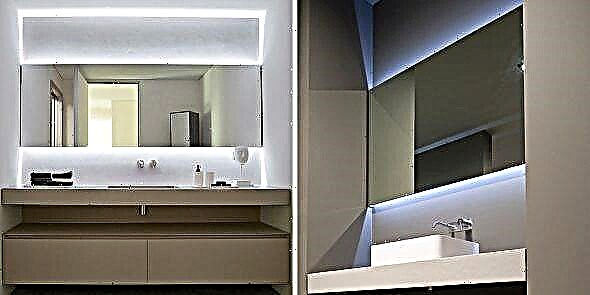
How to make a backlit mirror inside
Another option is the backlight. This creates the effect of soft, even light and clear reflection without shadows. The principle of operation is the same, it was described above how to make a mirror with illumination along the contour, but only in this case the LED strip is fixed with double-sided tape from the inside of the mirror. The result will be a very beautiful blurry glowing outline.
In the same way, you can create with your own hands almost any mirror with illumination, for example, an elegant small mirror for the dressing table in the bedroom. Many girls will like this handmade gift. The luminous mirror wall opposite the bathtub looks very impressive - or individual shelves can be emphasized. The technology allows you to create an unusual effect of an endless mirror corridor with a glow in the hallway - designers often design this way.
It is more than possible to make the illumination of the mirror contour yourself - the main thing is to follow the safety rules. Whatever you choose - a light cabinet, a mirror in the bedroom or hallway, LED illumination of the mirror in the bathroom - installation of a luminous structure will not take much time, and the result in any case will be an effective and functional solution.
Be aware of all events.
I hereby give permission to ALV Trade LLC in order to improve the quality of service, improve the service - collect, record, systematize, accumulate, store, clarify (update, change), extract, use, transfer, including entrusting processing to other persons, and namely Transport companies, post offices to provide services for the transportation and transfer of goods, anonymize, block, delete, destroy my personal data: surname, name, middle name, home and mobile phone numbers, email address ronnoy address, passport details.
Materials and Tools
Making a pendant or floor mirror yourself has some advantages. Firstly, the master can create a model that fits perfectly into the interior. Secondly, you need to spend only on materials, which significantly saves the budget.
To make any model of mirror you will need the following tools:
- screwdriver
- electric jigsaw for woodwork,
- ruler
- roulette,
- straight and Phillips screwdrivers,
- level for marking,
- hacksaw,
- pencil,
- scissors.
Options, depending on the option chosen, may vary. The basic set of materials is as follows:
- a suitable size mirror
- material for the frame (may be metal, plastic or wood)
- glue,
- self-tapping screws
- metal corners, if the frame is wooden.
How to do it yourself
When choosing a model, you should be guided by the purpose, as well as considerations of what kind of backlight for the mirror I would like to get. By the type of lighting, one can distinguish:
- makeup mirror (dressing room) with LED strip,
- wall mounted
- outdoor
- desktop
- for the bathroom.
It is best to use master classes on the manufacture of these models, they will reduce time and avoid the most common mistakes.
Wall
For the manufacture of a wall mirror with illumination around the perimeter you will need:
- mirror 114 x 76 cm,
- 4 fluorescent lamps (two of 30 W, length - 910 mm, 2 of 18 W, length - 605 mm),
- chokes, starters, cartridges, clips for fixing lamps,
- frame board,
- baguette,
- 10 mm thick plywood sheet,
- liquid Nails,
- self-tapping screws.
The build process consists of the following:
- Saw the board into 910 and 610 mm lengths. Using a screwdriver and self-tapping screws, assemble the frame.
- Install fluorescent lamps around the perimeter of the backlit mirror with your own hands. Connect them together in series and bring the wire to the switch.
- Cut the base from the plywood sheet, adding 65 mm to each side of the frame. Attach the frame to the base using self-tapping screws.
- Use liquid nails to glue the glass and base of the frame.
- Cut the ends of the baguette at an angle of 45 degrees. Attach them to the frame using self-tapping screws. Spin on the back of the structure.
It remains to choose a place to install. Such a luminous mirror, made independently, can be used in the hallway, bedroom, nursery, living room. The backlight for the mirror will create the effect of soaring in the air.
Dressing room with LED strip
Do-it-yourself cosmetic mirror can be made by a similar principle. It is designed to create additional lighting when applying makeup. To make a mirror with LED backlight, you need to prepare:
- 650 x 650 mm mirror canvas
- 2 mirror strips 40 x 650 mm in size,
- adhesive adhesive Titanium Power Flex,
- 2 pieces of LED strip with connectors 560 mm long with a power of 9.6 W, which will create a luminous halo around the mirror,
- 1 power supply for LED strip (input voltage 100–240 V, output 12 V, power 5 A),
- push button switch
- double-sided tape for attaching the tape,
- 4 pieces of 560 mm each from a U-shaped aluminum profile 20 x 20 mm,
- 2 pieces of 650 mm each from an aluminum corner 40 x 40 mm, in the center of one of them you need to drill a hole for a push button switch,
- 2 pieces of 560 mm each from an aluminum corner 25 x 25 mm,
- 2 plastic panels of 650 mm each.
The power supply must provide a thirty percent power reserve, but not exceed 50% of the power of the LEDs. To calculate, you need to multiply the power of the LED strip by its length and add the necessary reserve.
When ordering a workpiece in the workshop, you should ask to remove the amalgam around the perimeter so that a 20 mm wide frame is obtained. Specialists of any company will offer possible options for decoration and design.
In the process, a soft cloth is placed on the working surface of the table. It will protect the glass from possible scratches.
Having prepared all the components, you can start assembling. Below is a step-by-step instruction for manufacturing a mirror with LED strip:
- Using a pencil and a ruler, transfer the dimensions of the frame to the back of the glass. It is necessary to use a degreaser to prepare the surfaces for gluing.
- Place the plates on the vertical sides of the mirror. Use glue to connect aluminum rails from a corner of 25 x 25 with a mirror and mirror stripes.
- Carefully lay the guides from the profile with the central shelves to each other and securely fix until the glue completely dries.
- Glue aluminum corners from profile 40 x 40 to the upper and lower sides of the mirror.
- Install the power supply inside the frame.
- LED strip is glued only on the vertical walls of the inner rails on the outside of the shelf. Use connectors to assemble the tape into an electrical circuit. Solder the wires, observing the polarity. Install the power button in the socket on the bottom element of the frame, connect it to the LED strip and connect to the power supply.
- Close the top side rails of the frame with plastic panels, which will also act as a reflector when illuminating the mirror with an LED strip.
- Connect the structure to the network and check the operation of the LED strip.
When choosing an LED strip, you must be guided by its characteristics: power, the number of LEDs per meter, the presence or absence of a moisture-proof coating, the characteristics of the emitted light - warm or cold gamma. In the bathroom, you can make a mirror with backlight by choosing an LED strip with moisture protection.
You can cut the LED strip only according to the markings affixed by the manufacturer.
Buy or do?
Of course, the shelves of shops and markets are full of mirrors for every taste and pocket, however, a thing done independently is in any case more reliable and cheaper. Important is the manifestation of one’s own taste and the embodiment of one’s vision in a product.
Mirrors can miraculously make a room visually larger if you place it correctly and choose a size.
The shape of the mirror is better to choose, given the presence of geometric shapes and lines of the bathroom.
Making a do-it-yourself mirror with your own hands is a snap. In this process, you will not need special professional skills or tools, it is enough to determine the appearance and design of the mirror.

The color of the mirror should be combined with the shade of the bathroom, namely the ceiling, floor and walls.

Or, on the contrary, you can focus on the area of the mirror by choosing a brighter shade.
Design Choice and Design Features
First you need to choose the size, shape and type of mirror. These parameters are worth choosing, guided by the size of the bathroom and your own imagination. Lighting can be provided with bulbs, but the option with LED strip looks more compact and modern.

A backlit mirror not only expands the space by reflecting objects, but also reflects the light emitted by it.

It is appropriate in a chic and modest interior.
The backlight will be applied along the contour of the mirror, either in a special box, or simply on duct tape. If the mirror has a complex geometric shape with bends and curvatures, the installation of the box will be difficult, therefore it is easier to limit yourself to tape, which is better to glue on the back of the mirror, providing a pleasant hidden glow.

A backlit mirror can also have additional heating, which helps to avoid fogging the glass while someone is taking a shower.
If desired, the design can be equipped with a sensitive IR sensor, with which you can adjust the brightness and backlight modes (such work requires some knowledge in electrical and electronics).

Illuminated mirrors create the most successful lighting for cosmetic procedures, since the light emanating from it is sent to the reflected object, without creating distortions and shadows.
Manufacturing process
- To begin with, mirror glass is mounted on a frame. The simplest option is a plastic base, which is attached to the glass with glue. At this stage, it is necessary to provide hooks or hinges with which the finished mirror will be hung on the wall.
The mirror on which the backlight will be installed.
The size of the back frame is determined based on the size of your mirror.

As a glue, it is necessary to use a neutral sealant for glass, so as not to damage the amalgam of the mirror.
Before gluing all the elements, the glued surfaces must be thoroughly degreased, because otherwise the design will lose its reliability very quickly in conditions of increased humidity in the bathroom. Adhesive is best chosen waterproof and neutral in chemical composition, it will last a long time in a room with humidity and did not damage the structure of the glass. Sealants are best suited for these purposes.

The channel has a double function: they are glued tape, and plastic covers are attached.

Covers are necessary, they play the role of a reflector and do not allow the mirror to shine through at the junction with the wall.

Work carefully to avoid damage to the mirror surface.

If desired, a special metal profile can be used when gluing from the outside of the structure.

It is important that the power of the PSU is no more than 50% higher than that of the LEDs, otherwise, due to overload in the network, the LEDs will very quickly fail.
Given the high humidity of the bathroom, all work related to electricity must be carried out in full compliance with safety regulations.

Thus, you can create your own unique mirror, which no one else will have.
As you can see, there are no special problems installing the backlight on the mirror.
So for the mirror we need:
1. The mirror itself. I bought in Leroy Merlin inexpensive for 660 rubles. Size 90 * 55 cm
2. Aluminum profile U-shaped 20 * 20 * 2000 mm
3. Aluminum profile strip 15 mm wide
4. Foam molding 20 mm wide
5. Gold paint 1 spray can and silver paint 1 spray can
6. Silicone adhesive sealant in tubes for mirrors. To him I had to buy a special pistol. Sealant 290 rubles, gun 300 rubles.
7. LED strip 4500K 220 LEDs per meter - 4 meters. Usually it is sold at 5 meters, so I have one meter left. In the market, I asked to cut me into four pieces of 90 cm and solder the wires. Total it came to me in 1100 rubles. But you can find the tape simpler or not so bright.
8. 12V power supply, be sure to consult with the seller so that it is enough for your mirror. Mine cost me 1200 rubles.
9. 12 volt power button. Just choose the one that you like and can fit into the profile of 20 mm (i.e., its width should be no more than 18 mm.
10. Wires for connection. Consult the seller. Very thin wires can get hot and burn out. Heavily thick create unnecessary power loss.
11. A 220 volt plug. What is then inserted into the outlet.
I will describe in stages the assembly of a backlit mirror.
Stages can be broken, but not significantly. I will try to describe in detail how to make a mirror with lighting with my own hands.
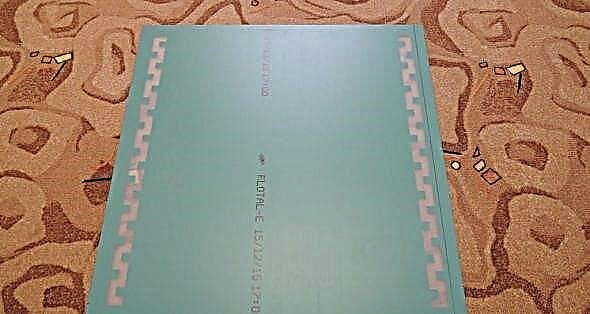
The very first thing we should start with is to prepare a mirror. Set aside on the wide side of 6 cm and seal with masking tape as in the photo. Side stripes serve as reflector and diffuser. Just in case, I tighten the whole mirror with paper or film. I glue the joints again with masking tape so that when spraying paint from a spray can, the mirror itself will not be stained.
When the mirror is pasted over, I paint it with silver paint from a spray can. Take care that the paint dries, otherwise it can be easily damaged and then you have to tint.
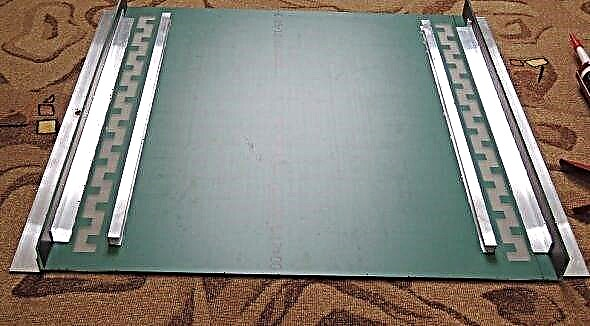
After removing the adhesive tape from the mirror, we proceed to create the frame on which the backlight will be mounted. U-shaped aluminum profile should be cut to the size of the mirror. I have two 90 centimeter pieces. In one of the profiles, you need to cut a piece into which we paste the backlight button. This is important to do before we stick the LEDs on the profile,
Since the glued LED strip is almost impossible to tear off the profile. Then we glue the LED strip inside the aluminum profile on both sides, as in the following photo.
So far, we set aside all our designs for the future makeup mirror with backlighting to the side and begin preparing the frame.
I chose the gold color of the frame for the backlit mirror as I like the combination of gold and silver. But you can choose any other color. Foam molding can not be painted from a spray can, since the paint dissolves it. It must be primed with plain white paint for walls or ceilings. And it is advisable to do this very carefully and in two layers. Since if you don’t paint even a small speck somewhere, the paint from the spray can get there and corrode, you get a hole. After drying, I paint the primed profile from the spray can.
In the foam molding for the lower part of the frame, I cut a channel with a knife to lay wires in it for connecting the LED strip and hide the connections in it.
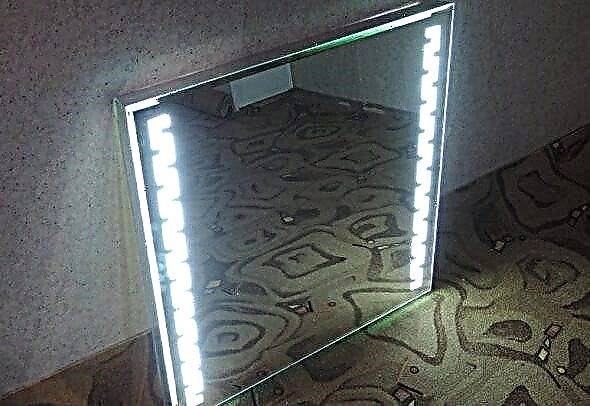
The most critical part of the work, I consider the assembly of the electrical circuit. I will not give here an electrical circuit for assembling wires. If you are not confident in your abilities, be sure to call a person versed in electrics. The scheme is not complicated, but in case of improper assembly there is a big risk of fire. Be careful!
Our task is to assemble an electrical circuit where the switch will turn on all four tapes at once. The power supply is connected to the switch and connected to the network. All wire ends must be insulated with electrical tape or special heat-shrink insulation! It is very important! If two bare wires touch each other there may be a short circuit and fire! If one bare wire touches a metal frame, you may be shocked! It is life threatening!
If you liked the mirror, then like!
And if you are too lazy to bother yourself, then you can purchase it here.
Decoration and decorating options
Depending on the flight of creative thought, a finished mirror can be decorated with a picture or a sticker, as well as place fixtures in some kind of bizarre shape.
If you wish, you can collect multi-colored lights, but in this case, additional equipment will be needed.
An interesting option is mirrors equipped with touch panels that respond to touch, but this option is costly and at home without the help of a professional to make it quite problematic.
The backlight can be made in various ways, for example along the edge of the mirror canvas in the form of a frame.
As you can see, there are no particular difficulties in this process, so the self-made production of a backlit mirror can give you a wonderful interior element that will perform not only a decorative function, visually expanding the bathroom very favorably, but also illuminate the room with the pleasant light of diode lamps.
A backlit mirror is an ideal choice for creating diffuse lighting in the bathroom.