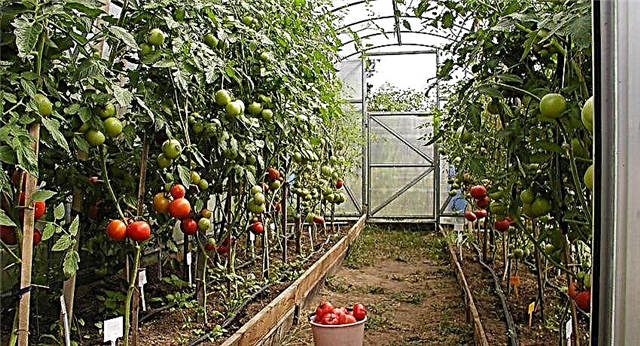
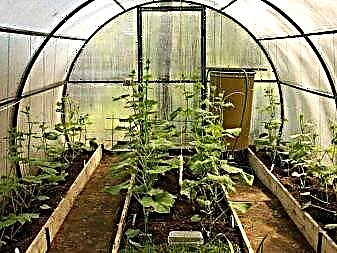
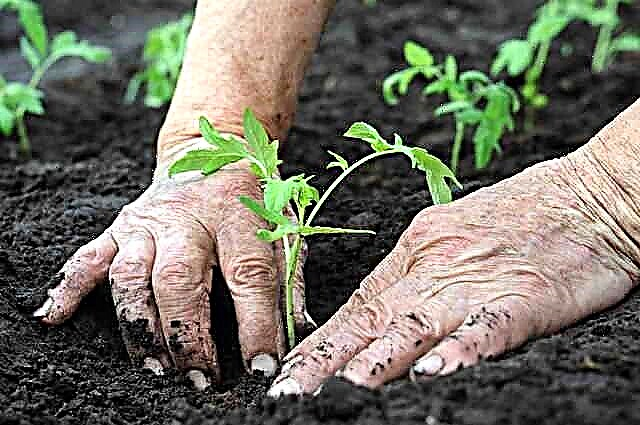
No one has come up with a better way to grow vegetables than in a greenhouse. But at the same time, he requires the owner of painstaking and hard work. To achieve a really good harvest, a country greenhouse should be:
- warm
- with the correct ventilation mode,
- with the right option for interior design.
If everything is more or less clear with the first paragraph, then there are questions regarding the other two. Today, the focus of our attention is on the tricks of planning the arrangement of the greenhouse inside. We will tell you how to equip a polycarbonate greenhouse when the ventilation sashes need to be done from above and when on the sides, what should be the design of the beds inside the greenhouse and what to make tracks from, can you create an attractive design from improvised tools, as well as many other useful and necessary gardeners to the landowner of information.
Types of greenhouses by the nature of the internal arrangement
You can divide greenhouses into different types according to the following criteria:
- Arrangement of beds.
- The presence of a greenhouse.
- The presence of additional equipment.
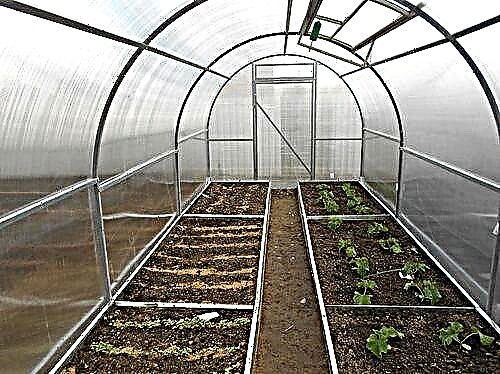
First things first. The arrangement of a polycarbonate greenhouse begins with the solution of the issue of beds within the greenhouse.
Here you can also divide into 3 types:
- The number of beds (depending on the size of the greenhouse and the crop grown).
- Location according to cardinal points.
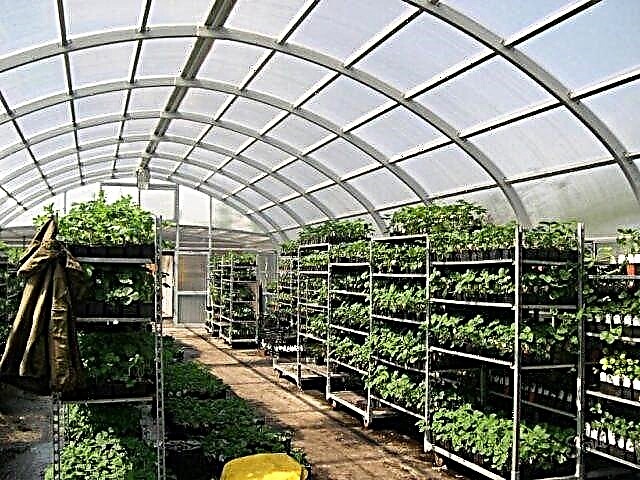
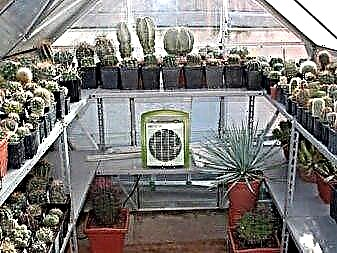
- The presence of shelving (often used for growing seedlings).
The next issue that needs to be addressed is the greenhouse inside the greenhouse. The greenhouse is a fenced part of the greenhouse. For this, a plastic film, polycarbonate, glass, spanbond, etc. can be used. The presence of a greenhouse is necessary in the following cases:
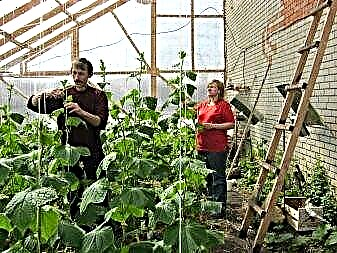
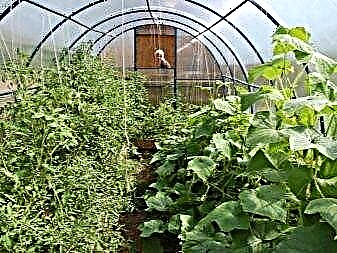
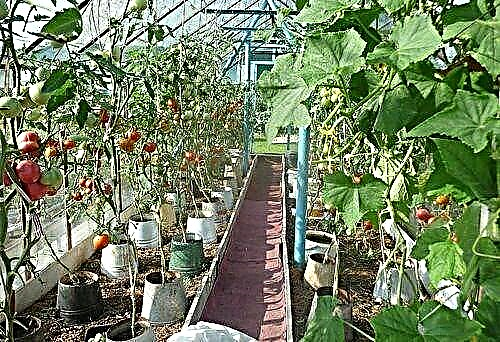
- Growing several greenhouse crops. For example, tomatoes and cucumbers do not grow well next to each other in a greenhouse, since they require completely different growing conditions.
- When you need to fence off part of the structure, to use it as a kind of pantry.
As additional equipment from the inside of the greenhouse, you can use:
- organized heating
- automatic irrigation system
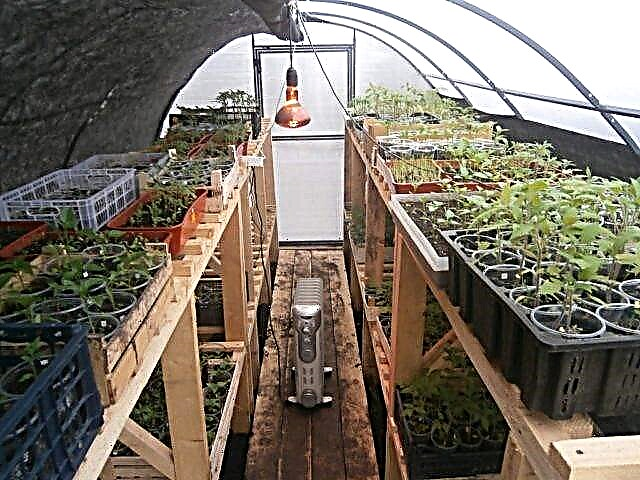
- additional lighting
- ventilation system.
All this helps the summer resident to grow a larger crop. Such equipment can be used both in industrial greenhouses and in summer cottages.
How to equip a greenhouse inside
We equip the polycarbonate greenhouses with our own hands. Here are some general recommendations:
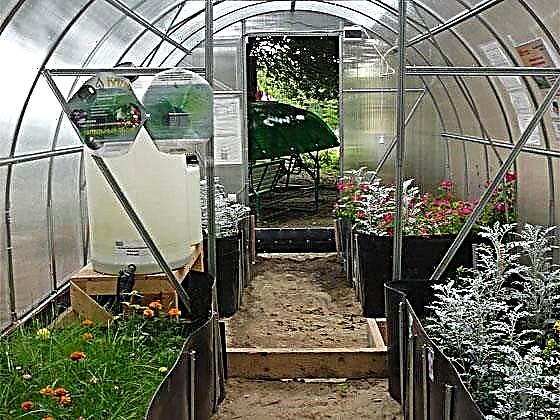
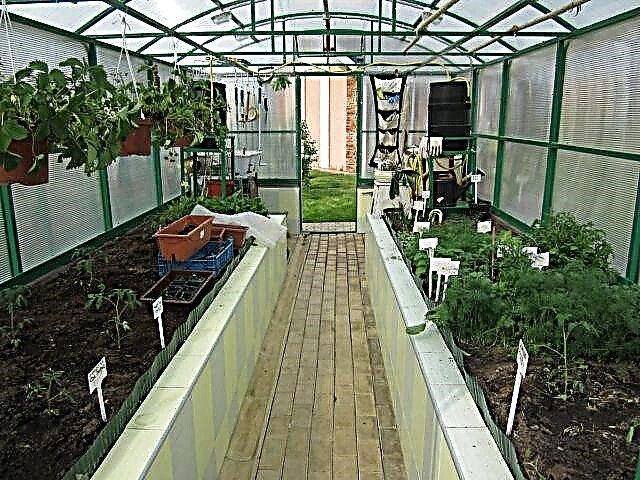
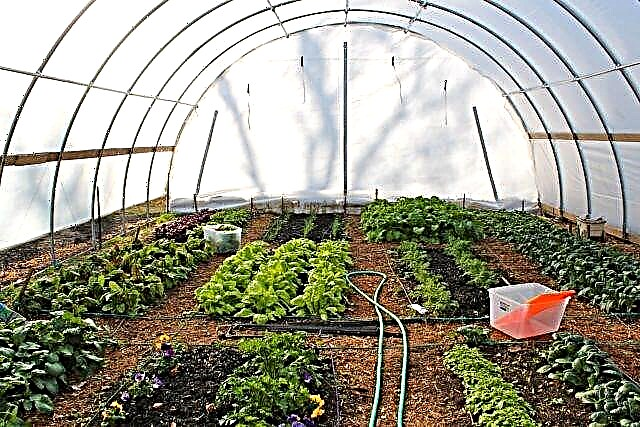
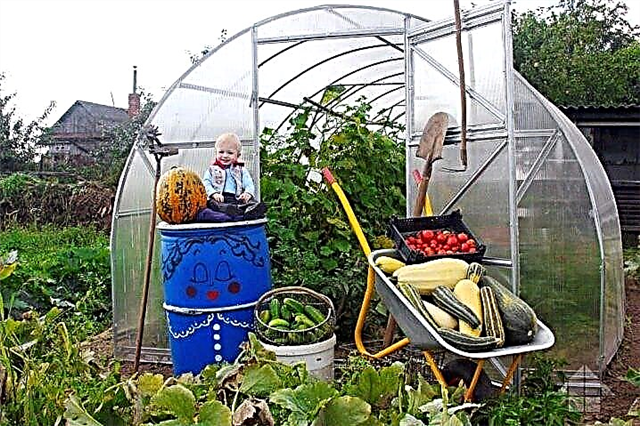
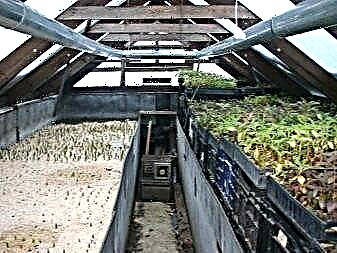
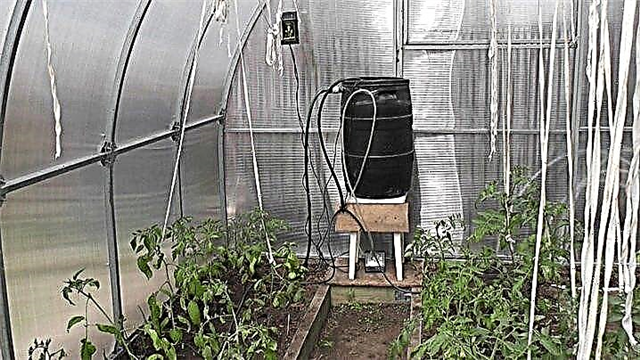
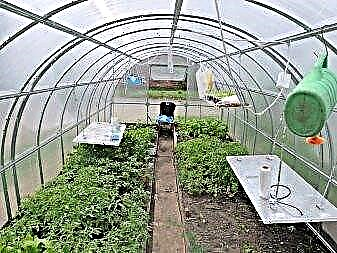
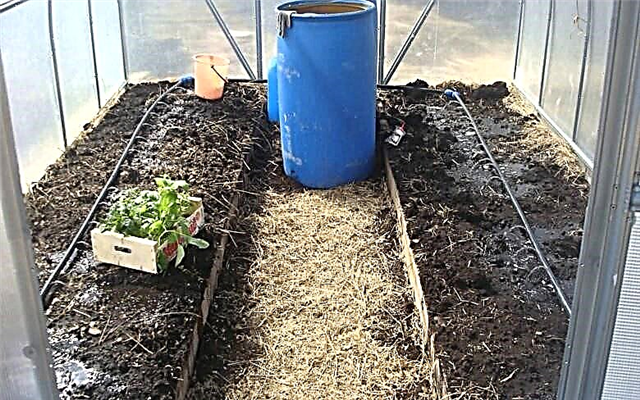
- If possible, the internal arrangement of the greenhouse should contain a technical area. This refers to a place free from plantations. Here, if necessary, it will be possible to leave a working tool, put a barrel of water to increase humidity, put firewood, when using heating, etc. These places are thought over and arranged in advance. So, a barrel of water should stand closer to the center of the structure in free access so that it can be approached and collect water for irrigation.
- The device of the greenhouse inside should be equipped with shelves and hangers, which should also always be in the public domain. Here it will be possible to hang (put) scissors for trimming stepchildren, work gloves, watering containers, etc.
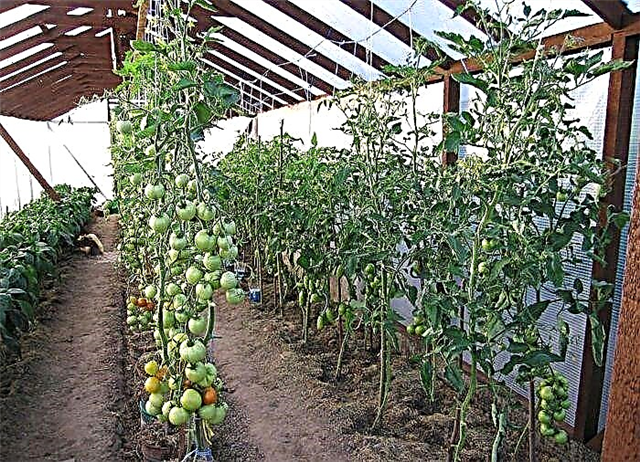
- The polycarbonate greenhouse should be equipped with rungs along the beds. Most greenhouse crops are grown using trellis, and subsequently it will be convenient to hang twine on these rails.
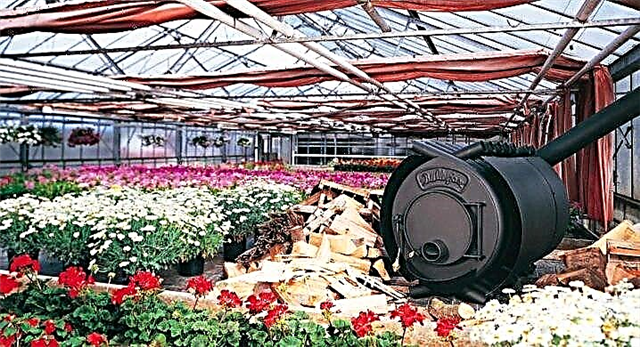
- In order to properly equip the furnace heating system in the greenhouse, keep in mind that maximum heat transfer is needed here. So, if possible, the chimney pipe should go inside the structure.
In general, the decoration and arrangement of the polycarbonate greenhouse inside may contain a large number of variations and depends on specific features. We have provided only general recommendations that will be useful for any chosen option.
Track breakdown
Lanes in a greenhouse can be arranged as follows:
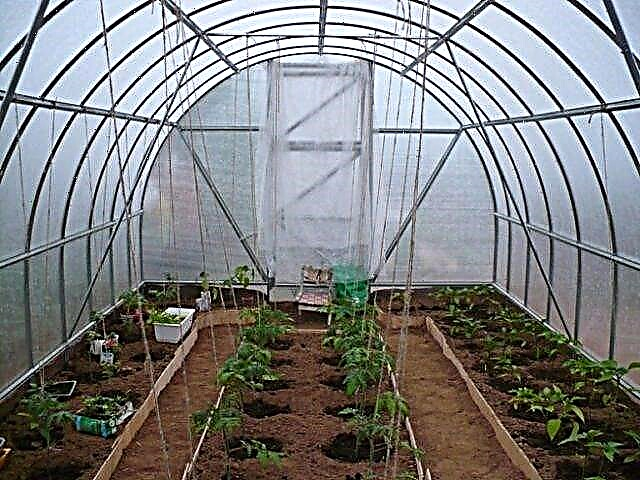
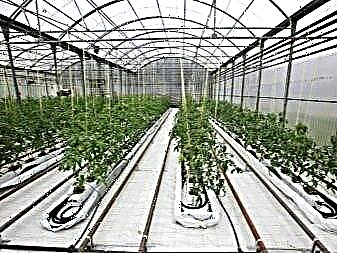
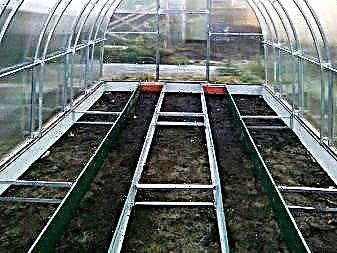
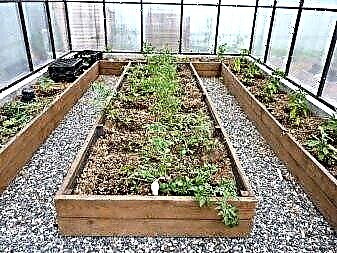
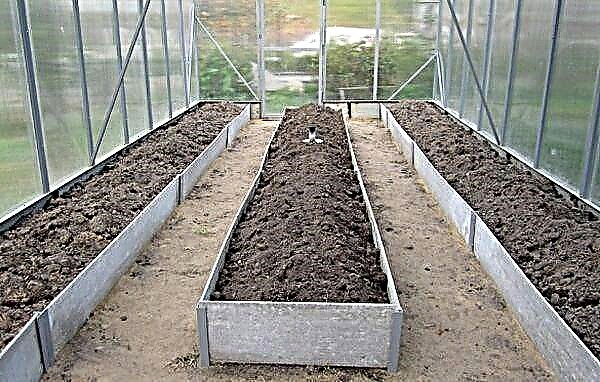
- One track in the center and two beds at the edges.
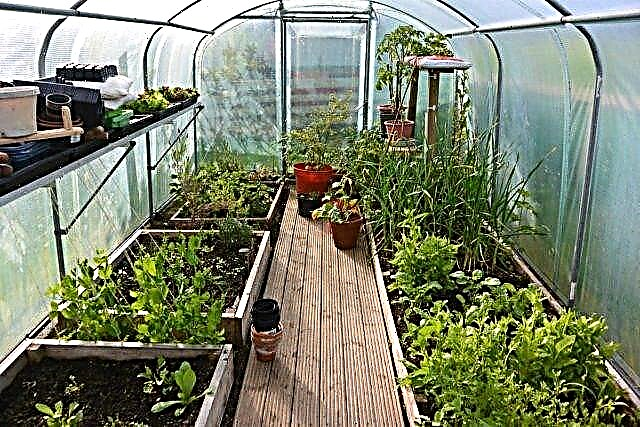
- You can make a path in the form of a snake, which begins at the entrance, runs along all the walls of the greenhouse and ends at the place of its beginning. Thus, we get two beds: one solid along all walls (goes from the outside of the track) and the second in the center (from the inside of the track).
- With a large number of beds, you can arrange the tracks with a network of paths to provide a free approach to all plants.
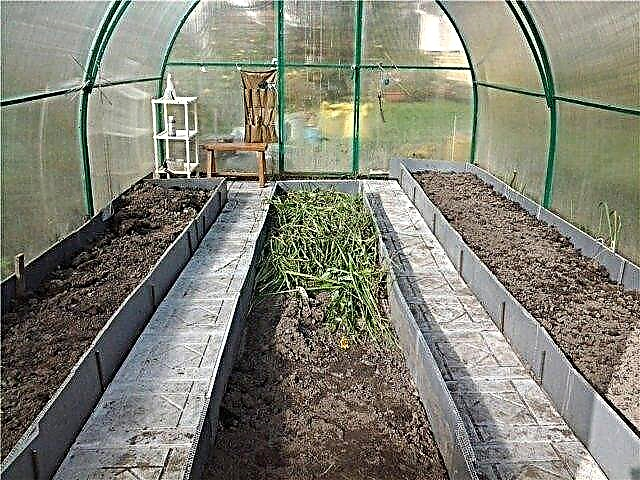
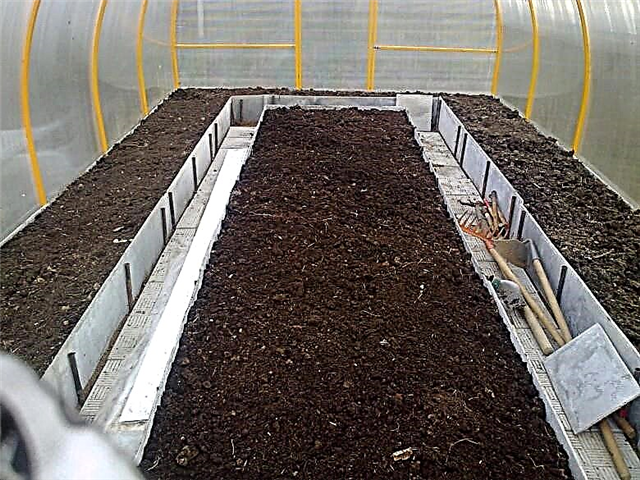
Inside the greenhouse, it is not superfluous to fence the paths. To do this, you can use bricks, tiles, slate or boards. It is advisable to treat the boards with an antifungal solution so that they do not bring the disease into the greenhouse. The height of the fence should be greater than the height of the beds by about 3-5 centimeters. It is necessary to enclose the tracks for 2 reasons:
- So that the land does not fall from the beds, and the roots of the plants are not exposed.
- So that water does not flow out on them and does not turn the earth on the path into porridge.
You can also build tracks using special coatings. As such a coating of paths in a greenhouse, you can use:
- paving slabs or whole bricks,
- stones and broken bricks.
Breakdown of beds
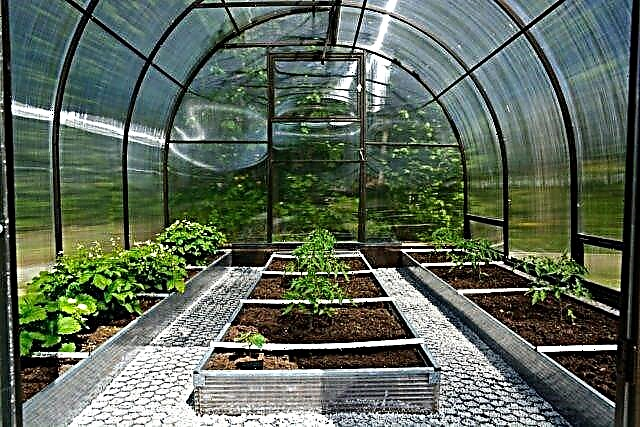
The arrangement of beds in a polycarbonate greenhouse depends primarily on its size. It is believed that the optimal width of the beds is 45 centimeters, and the distance from one to the other is 90 centimeters. If so arrange the beds in the greenhouse - then the plants will not obscure each other, giving access to light.
In existing realities, the beds inside the greenhouse are much denser in order to save space and grow as many plants as possible. We recommend proceeding as follows:
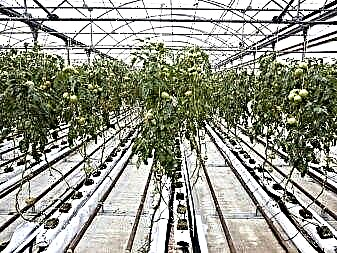
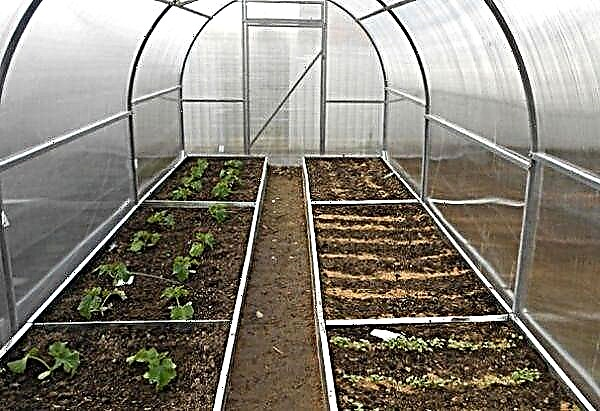
- All beds should be located from north to south, so they will receive uniform lighting throughout the day.
- The distance between the beds depends on the crops grown. With the trellis method of growing cucumbers, the distance between the beds should be at least 30 centimeters, and better yet, so that the plants do not obscure one of them. The tomato beds can be arranged a little denser, since they do not have such burdock leaves.
- It is not recommended to make beds with a width of less than 40 centimeters (if we are not talking about flowers, herbs and other crops with an underdeveloped root system).
- It is permissible to arrange the beds as in gardens: one long ridge is divided into sections by paths running across it. This is the best option for wide beds.
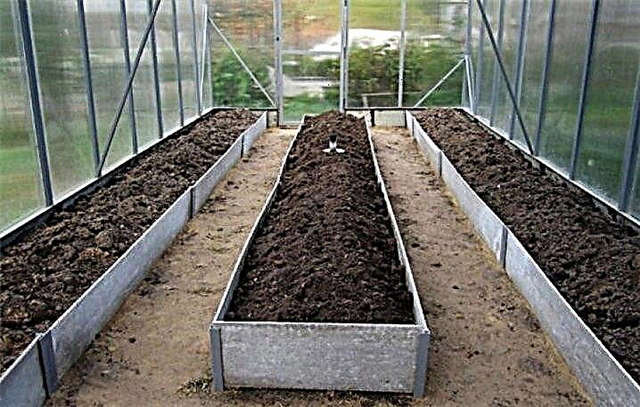
- The beds should have partitions on the sides. Necessary to prevent shedding of the earth and exposure of roots.
- It is not recommended to plant three rows of plants on one bed, with the exception of cases of arranging the beds according to the garden type.
Shelves and vertical beds for strawberries
How to make shelves in a greenhouse with your own hands for growing strawberries? Here are some of the most popular options:
- How to make shelves from boards. It is necessary to construct a structure such as a rack with a side height of up to 25 (possible less) centimeters. When making it, initially think about how you will water and pick berries.
- For strawberries in the greenhouse, you can use the "pocket" system. To do this, from durable fabric, it is necessary to make small bags with a depth of 20 centimeters and a diameter of 10 centimeters. They can be hung on a sufficiently strong wall, or, if possible, on the frame of the greenhouse.
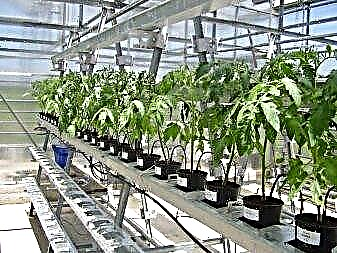
- For planting seedlings in the greenhouse, you can use the shelves on which the pots will be placed. Shelves are made in the form of racks without boards.
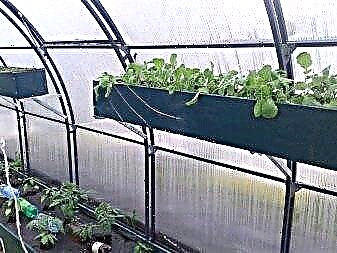
- Vertical strawberry beds from pipes are gaining popularity. They are arranged as follows: a pipe (iron, plastic, etc.) with a diameter of at least 10 cm, is stuffed with earth and fastened vertically, or slightly under a slope (a special frame can be made). Every 15-30 centimeters (depending on the variety) make cuts in which strawberries will be planted. Ideally, if the pipe is equipped with a drip irrigation system.
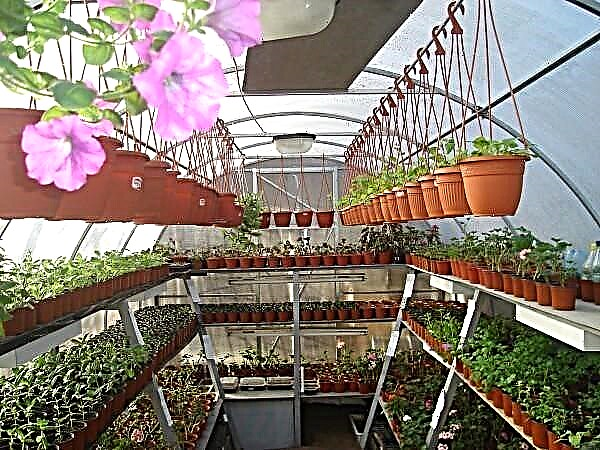
- If you need only a small amount of strawberries - you can use accessories in the form of flower pots. They can be hung on hooks made at the top of the greenhouse. So they will not interfere with the main culture.
Ground type equipment
The internal arrangement of a greenhouse with crops that will be grown in soil-type beds should look like this:
- All beds are located strictly from north to south. During the day, each of the plants will receive uniform illumination.
- The width of the passage is not less than 30 centimeters. Otherwise, during the period when the plants reach their maximum growth, you simply will not be able to walk on their paths.
- When watering plants manually, the width of the paths should be even greater so that you have the opportunity to safely walk with a container filled with water.
- The soil for cucumbers (cucumbers and zucchini) should be soft. It must be constantly loosened. Think in advance of such a width of the beds so that it is convenient to loosen the earth from all sides.
- Try to use the sides. Firstly, the earth will not crumble, and the roots will not be exposed, secondly, the location of the beds above the track makes them warmer, and all, without exception, greenhouse crops like warm soil.
Shelving arrangement
Do-it-yourself shelving for a greenhouse can be made of:
The longevity depends on the material for the racks. We analyze the features of the device and one and the second type.
How to make shelving in a greenhouse made of wood? To do this, you need columns and boards with a width of 20 mm (it is possible and more, but this is impractical).
Before digging in the columns, it will not be superfluous to treat them with an antiseptic and wrap them in polyethylene so that they last longer.
Columns are dug to a depth of at least 50 centimeters and carefully rammed. The instillation step is a maximum of 2 meters, and even less is better.
Depends on the height of the rack and the number of floors, if you plan to grow greenery or flowers in pots - one floor is enough and a distance of 2 meters between the columns should be enough.
Before installing the flooring, it is necessary to connect the posts with cross bars to give stability to the structure. Longitudinal rungs are mounted on top and boards for flooring are already packed on them.
Rack for seedlings from metal is made in a similar way. The only thing is that there is no need to treat it with an antiseptic and wrap it in polyethylene. In order for the design to last as long as possible, galvanized steel is used.
Ventilation
Greenhouse ventilation and heating are used for earlier fruit cultivation and increase yield. There are three options for using ventilation in a greenhouse:
- for even heat distribution,
- for through ventilation
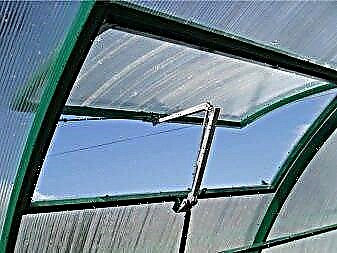
- for air access through the roof.
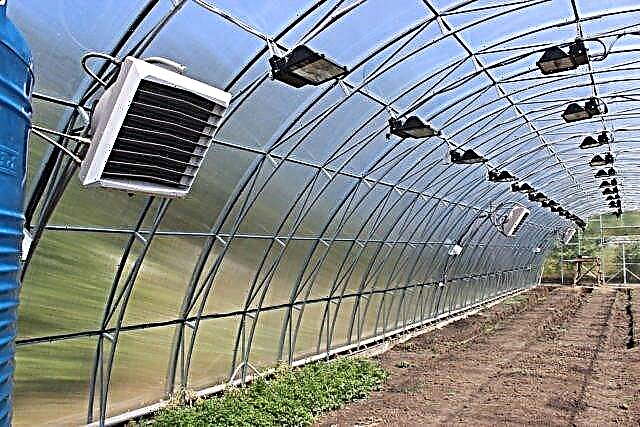
Often organize artificial ventilation with a stove heating system. To do this, you need a large fan that can disperse heat from the potbelly stove throughout the greenhouse. Such a system is especially useful when growing plants on shelves, since warm air rises and it is at the top that the fan can provide uniform heating of the greenhouse.
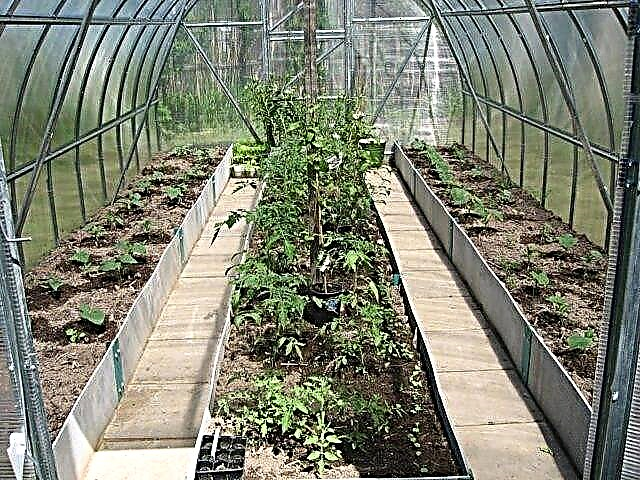
End-to-end ventilation is very useful for growing tomatoes. These plants love drafts, which means that it is necessary to place the sash on the walls of the greenhouse, and you can even opposite each other.
But the ventilation for the cucumbers should be on the roof. With regular use of through ventilation, the cucumbers turn yellow and cease to bear fruit. Therefore, they need to ensure a calm, even flow of fresh air, and best if the ventilation flap is located on the roof. If this is not possible, it is necessary to place the sashes on the wall as high as possible, and in no case do them opposite each other.
As you can see, the arrangement of the greenhouse can be done with a huge number of variations, and first of all, here it is necessary to take into account the culture that will be grown. For some, the best option would be the arrangement of earthen beds and the cultivation of cucumbers with tomatoes, while others will prefer to save space and find that it is better to choose a system of vertical beds, or shelving, for growing strawberries for a greenhouse.
Features of the arrangement of greenhouses
A greenhouse is a space that is intended for growing plants, as well as for preparing crops for planting in open ground. It is important to properly organize the greenhouse inside, taking into account its size and the needs of the gardener. Indoors, a certain temperature regime, humidity level must be observed. If during the work you adhere to the main recommendations, tips and tricks, that is, it is possible to grow several types of plants in one greenhouse, making the most competent use of the available space.
Since greenhouses are not only different in size, but also in purpose, the internal arrangement will be significantly different. For example, in some it is necessary to break the beds, in others to equip racks. If necessary, you can add additional equipment, which will greatly facilitate the process of growing crops.

The device of beds and paths
Before proceeding with the internal layout of the greenhouse, it is recommended to take into account some important rules:
- first decide which crop will be grown in the greenhouse: some types of plants are best grown on beds, and for others it is best to use racks,
- many gardeners advise initially to spread a plastic film in a greenhouse, then fill it with soil, then after watering the plants the water will not go into the ground,
- so that the land from the beds during the maintenance process does not crumble into paths, it is worth protecting them, for convenience, you can lay out the paths with brick, tile or boards,
- All building materials used as fences must be moisture resistant and treated with special protective compounds that prevent the appearance of fungus and mold.
All work on the arrangement is recommended to be carried out before the beginning of the summer season.
Location
The greenhouse inside should look not only beautiful, but also be as comfortable as possible. In addition, it is worthwhile to navigate around the world, which significantly affects the level of productivity. The best solution is to arrange the beds inside the greenhouse along the east-west line, as a result of which the crop will receive a sufficient amount of sunlight throughout the day.
It is important not only to look at the design of the greenhouse inside in the photo, but also to understand how wide the beds should be and how many of them should be done:
- beds are considered optimal, the width of which varies from 70 to 90 cm, under these conditions, the seedlings will receive the necessary amount of light and moisture,
- the width of the track is 40 cm, as a result of which it will be convenient to move around the greenhouse.
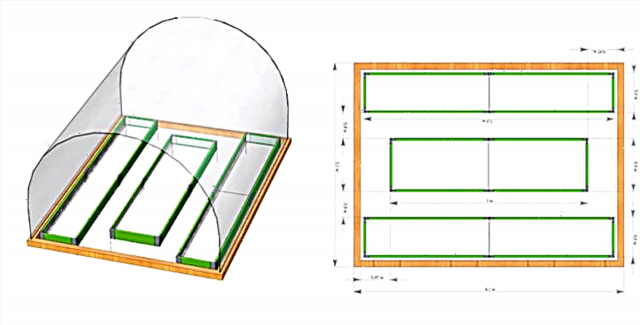
When arranging a 3-by 6-meter polycarbonate greenhouse, 3 beds 70 cm wide and 2 tracks 45 cm wide can be made inside.
Sides for beds
In the process of arranging the beds inside the polycarbonate greenhouse, everything needs to be done so that the earth does not crumble after irrigation. For these purposes, use the sides:
- if you want to choose the easiest way, you can bury the boards in the ground, pre-treated wood with special protective substances in order to prevent the appearance of fungus and mold,
- You can use facing or ordinary brick to decorate the beds inside the greenhouse, it is important to understand that such a design has an attractive appearance, but it takes up a lot of space,
- budget option - the use of polycarbonate sheets, which are pre-cut into strips of the desired height,
- if necessary, asbestos-cement slate can be used in the case.
The deeper the bumps are in the ground, the better this will affect the crop.
Track coverage
You can decorate the greenhouse inside not only with the sides and the beautiful arrangement of beds, but also with paths. If necessary, the paths inside the greenhouse can be covered with gravel or gravel, and then laid on top of the following types of materials:
- paving slabs
- brick,
- flat slat stones
- boards (when using wood, it must be treated with protective compounds, which will significantly extend the operational life of the material).
The most durable option is a concrete screed, which can be poured inside the greenhouse paths between the beds. Other than that, there will be much less weed grass.
Separation of crops in the greenhouse
Each gardener, having a greenhouse in his summer cottage, wants to use it to the maximum. Even if it is planned to plant in a greenhouse 3m by 6m, the layout must be done correctly. Separation of crops is necessary, since not all plants can be adjacent to each other. For example, tomatoes and bell peppers prefer sparse irrigation and fresh air, cucumbers require regular watering and a high level of humidity.
In order to have the opportunity to grow several different crops at the same time in a greenhouse, it is necessary to create favorable conditions for them, namely to divide the space using partitions for these purposes. As a partition, curtains made of plastic film or polycarbonate sheets are perfect. To understand exactly how the decoration of the greenhouse inside will look, you can see the photo.
How to equip a greenhouse
To date, there are a large number of options, thanks to which it is possible to correctly plan the layout inside 3x4 m, 3x6 m greenhouses. If the available space is used as competently and correctly as possible, then the process of caring for the culture can be greatly facilitated. In order to increase the level of productivity, it is worth taking care of heating, the availability of shelving, heating, an automated irrigation system. If necessary, you can equip the greenhouse inside with your own hands, without resorting to the help of specialists.
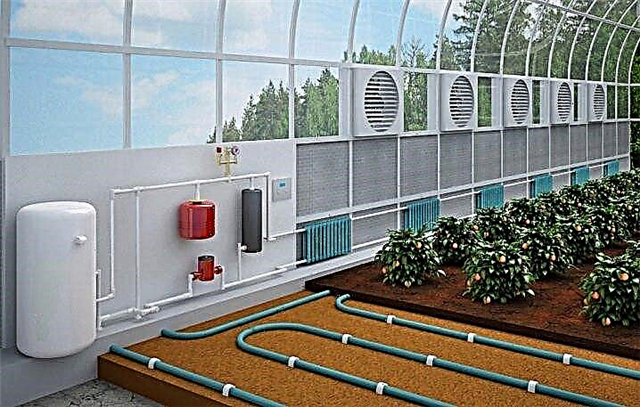
Drip irrigation system
It is impossible to imagine arranging a home greenhouse without a drip irrigation system, which greatly facilitates the process of watering the crop. It is also recommended to take care of this system at the beginning of the design of the greenhouse in order to avoid unforeseen moments and problems in the future. If you perform all the work correctly, it will be very easy to take care of the plants, and it will take a minimum amount of time.
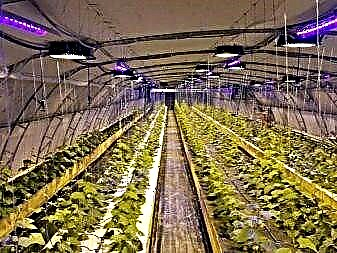
Lighting and heating
Additional lighting inside the greenhouse is required when the daylight becomes short and the seedlings do not receive the amount of sunlight necessary for growth and development. When choosing lighting, it is recommended to give preference to multi-spectrum lamps with blue ultraviolet radiation. In a specialized store you can buy LED, fluorescent and gas-discharge lighting.
Since heat is the main thing in any greenhouse, in addition to solar heat, additional heating will not hurt. Many experts recommend using several types of heating for arranging a greenhouse inside:
- gas-burners,
- stove for the use of firewood, peat, coal,
- electric convector
- water heating system
- solar collector,
- biofuel.
It is important to understand that you need not only to get heat, but also to keep it inside the greenhouse. That is why this issue should be given due attention even at the stage of designing a greenhouse made of polycarbonate sheets. At first, it is recommended that you first see a photo of how to make a greenhouse inside as competently as possible.
Shelving
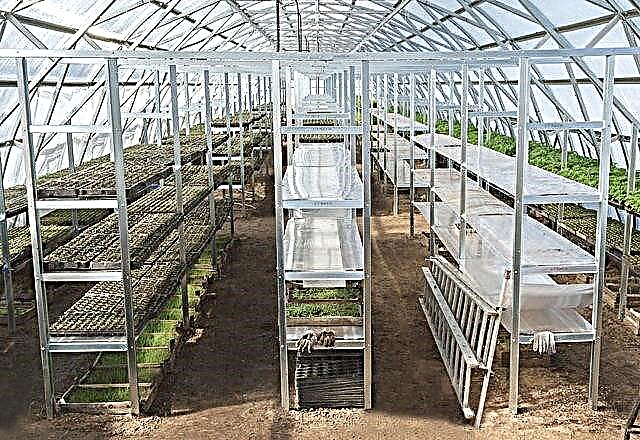
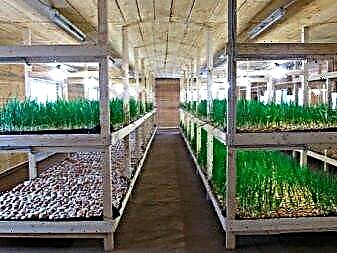
The use of shelving inside the greenhouse allows maximum use of the entire available area. In addition, it becomes possible to grow both tall and undersized types of crops.
If you plan to grow seedlings on shelves, then you should take into account the following advantages:
- the space inside the greenhouse can be used to the maximum,
- it’s much easier and more convenient to take care of seedlings,
- if necessary, seedlings can be placed depending on the level of thermophilicity of a particular culture,
- in the case when the racks are additionally equipped with wheels, they become mobile, so that the structures can be rearranged and turned to the sunlight on either side.
In the process of arranging racks, it is recommended to take care of the concrete base in advance. This is due to the fact that the weight of the rack along with seedling containers that are filled with soil will be quite large, as a result of which the soil under the structure will begin to sag.
Material for shelving
The arrangement inside the greenhouse of 3 m by 8 m must necessarily be done correctly, so that further care for the crop does not cause difficulties. For the manufacture of shelving it is allowed to use any type of building material. In addition, you can independently weld a durable metal frame at home or use a beam.
For horizontal shelves, boards are used that previously undergo the processing process with special protective compounds that prevent the formation of mold and fungus during operation. The distance between the shelves and their number is recommended to be determined based on the maximum growth of the culture. Thus, if we consider a greenhouse, whose height is 2 m, then inside you can place a rack of 6 shelves.
Rack installation
The improvement of the greenhouse inside, the photos are presented below, should be in the first place. Since the most important thing is to use the available space correctly, some gardeners install racks above the beds in the process of arranging greenhouses inside. It is because of space savings that multi-tiered and suspended structures appear. Such structures may have the same size or taper from the bottom up.
Quarantine zone device
When arranging a greenhouse inside with a width of three meters or more, you can take care of the presence of a quarantine zone. For these purposes, use aquariums with a volume of 100 liters or more, in which seedlings that are susceptible to diseases are placed. Such a container should definitely be placed in the darkest corner so that direct sunlight does not harm the leaves of seedlings. If timely isolate infected plants, then mass infection of all crops can be prevented.
Arrangement of a vestibule
Another important point that can be implemented in the process of planning the greenhouse at the cottage 3 m by 8 m is the vestibule. In the future, the vestibule can be used to store garden equipment. It is very inconvenient to constantly carry everything you need to take care of the crop from home or the barn to the greenhouse, it is much more convenient and comfortable when everything you need is at hand. To do this, it will be enough to fence off a small space at the entrance to the greenhouse where you can place shovels, cultivators, fertilizers, gloves, a chopper.
For maximum convenience, it is recommended to install special fasteners for fixing the cuttings of the working tool during the internal arrangement of the polycarbonate greenhouse, which will allow you to correctly use the free space.
Ideas for a beautiful design of the greenhouse inside
Today, there are a large number of options for arranging a greenhouse inside with your own hands, as a result of which you can get confused. Before proceeding with the arrangement of space, it is required to make appropriate measurements, to determine which culture will be grown. Only after that it is possible to start installing shelving or arranging beds. In order to properly equip a greenhouse made of 3x6 m polycarbonate inside, it is recommended to familiarize yourself with already completed projects.
Conclusion
The arrangement of the greenhouse inside is possible with your own hands without the involvement of third-party specialists. In this case, the main thing is to understand exactly what crops will grow and what dimensions the greenhouse has. Based on these parameters, it is possible to prepare a seat without any particular difficulty, to make paths of suitable width. If necessary, you can install additional equipment in the greenhouse - lighting, heating, a drip irrigation system. Some gardeners decide to make a vestibule, a quarantine zone - if space allows it.
Features and types of construction
The main functions of the greenhouse.
- Plant protection from external negative factors. These include cold precipitation, frost, strong wind, nighttime temperature drop.
- Preservation of temperature optimum for plantings.

Greenhouses come in different types and can be made of various materials. The size of the greenhouse structure and the tricks of the internal layout depend on the type of crops and plants that will be grown indoors.
The simplest option is a greenhouse made of ordinary window frames. This design can only be used in the warm season. Usually this is a small area facility for growing 1-2 types of crops.
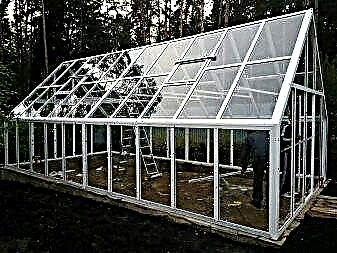
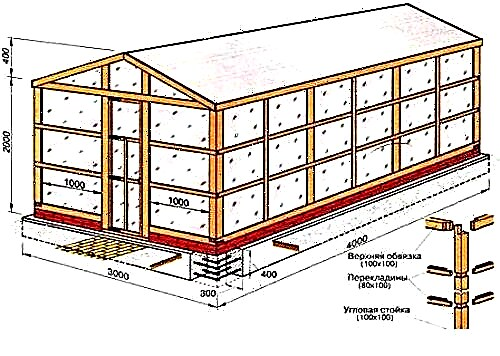
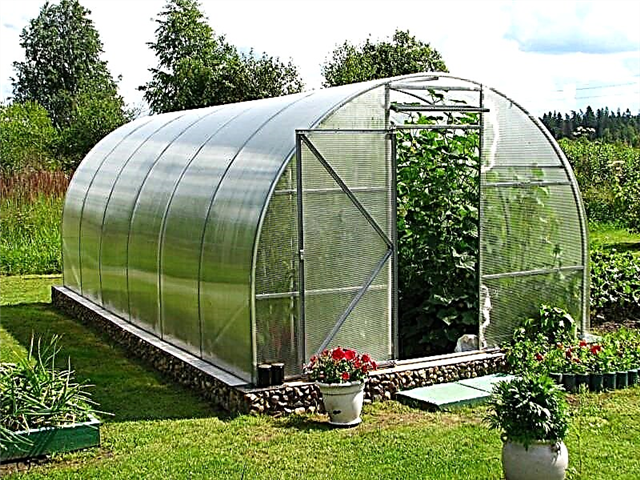
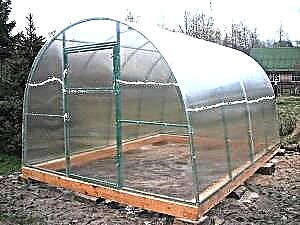
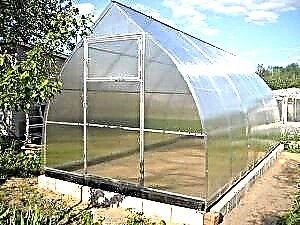
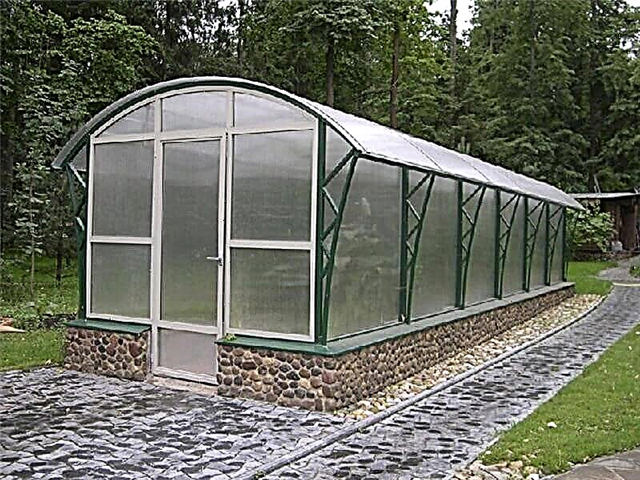
More durable and durable is the polycarbonate construction. It is lightweight and can be easily mounted on a prepared frame. Such a greenhouse can be of various sizes, up to impressive areas.
Without additional insulation, such structures are also suitable for operation only in the season with a positive temperature.

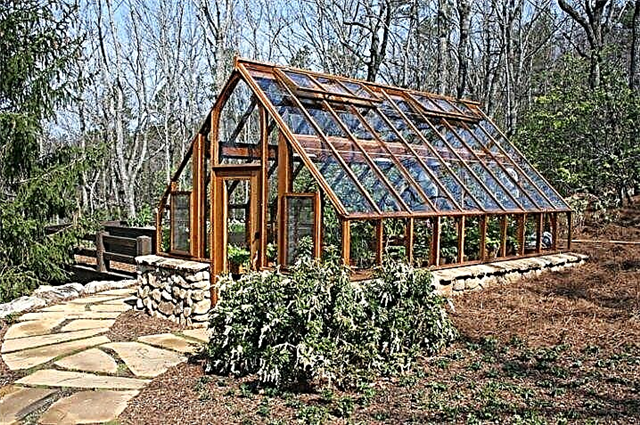
The most complex and universal construction is the greenhouse, which involves growing plants throughout the year. Such a design must have thermal insulation. It is also equipped with a heating system to maintain the desired temperature level in the winter.
A greenhouse for year-round use requires the installation of lighting. In the autumn-winter period, daylight hours are very short, crops that are grown inside will need additional light recharge.
Also, the space inside the greenhouse can be arranged for various methods of growing plants. If cultivation in soil is supposed, then the breakdown of beds is made. If the cultivation of plants will be carried out in pots, crates or containers, installation of racks will be required.
Sizes and shapes
A greenhouse can be used to grow just one crop in it. For example, to obtain a crop of cucumbers, a rather small (3X3 meter) construction is quite enough. It can be made of glazed frames or polycarbonate sheets on a lightweight frame.
If it is assumed that 2-3 types of plants will be grown in closed ground, it is better to provide a more spacious interior space. The most optimal option will be with dimensions of 3X6 meters.
To obtain a large number of crops or cultivate many types of crops, it will be necessary to install a greenhouse structure measuring 3 by 8 or more meters.
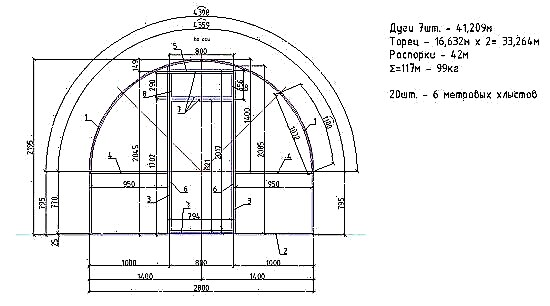
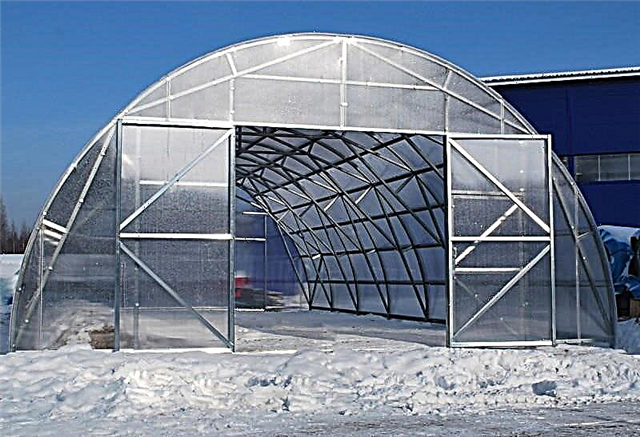
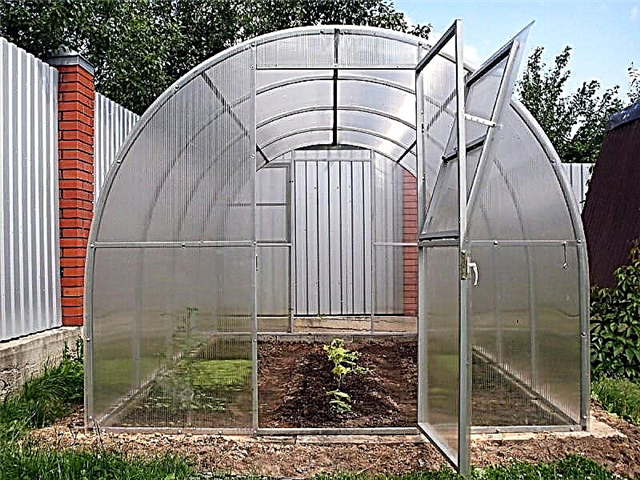
There are also greenhouses with a non-standard square shape. Polycarbonate greenhouses most often have a semicircular shape. This allows not to accumulate a large amount of snow or ice on the roof of the structure. In addition, a rounded arch makes it possible to tie tall and winding cultures. This shape of the frame gives a little extra space in height.
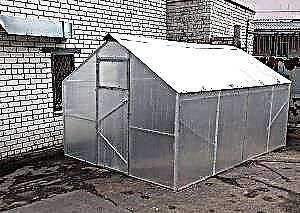
Less commonly, greenhouse constructions have a triangle-shaped roof. It is advisable for structures of a large area. If the greenhouse structure is collapsible and dismantled for winter time, the roof can be flat or with a small slope.
Drawings of the greenhouse design are designed based on the conditions of use, the desired amount of yield and the types of plants grown.
How to equip?
After the installation of the greenhouse structure, the main task of the agrarian is to create the most favorable conditions for growing crops in closed ground.
This task can be divided into the following subparagraphs:
- providing sufficient heat
- optimal layout and layout of beds,
- arrangement of tracks,
- soil preparation for planting,
- sufficient ventilation to prevent overheating of the air inside the structure,
- in the case of year-round operation of the greenhouse, the provision of heating and lighting in the cold season,
- if necessary, installation of shelving for the installation of containers and pots with plantings.
Heating
Maintaining the optimum temperature regime in the construction of covered ground is actually the main task. Particularly carefully considered the issue of heating is required for winter facilities with covered ground.
To ensure the influx of natural heat into the greenhouse from sunlight, the coating is made of transparent materials. It is also worth making sure that the temperature in the greenhouse does not drop much at night.
To do this, you can use the following methods.
- The stone stores heat well and holds it for a long time. After the sun stops heating the greenhouse, it can serve as a source of heating for some time. Stones can be laid out on the beds or paved with paths. The larger the area and the number of elements of stone material, the longer it will be able to warm and give off more heat.
- Water is also able to maintain temperature and give off heat from its surface. In the greenhouse, you can arrange containers, preferably dark or black. During the day, the water in them will warm up, and slowly cool at night and in the evening, while maintaining the temperature in the greenhouse.
It is worth noting that the above methods of maintaining temperature are not heating methods. They will only help reduce heat loss during the night summer season. To provide additional warming of the greenhouse, installation of more complex equipment will be required.
The main options for heating the greenhouse:
- the use of heating appliances,
- installation under paths and beds of a heat-insulated floor,
- the use of water or gas heating,
- installation of infrared heating equipment,
- installation of potbelly stoves for the firebox with firewood.
To maintain the temperature inside the structure, it is important to take care of reducing heat loss.
Particularly careful thermal insulation is required in winter greenhouses.
- In the cold season, it is better to change the windows in the greenhouse for windows with double frames. The reinforced double-glazed window will not only create an additional barrier to the outflow of heat, but also significantly reduce the formation of condensate.
- The greenhouse, which will be operated year-round, is usually attached to the wall of a heated building.
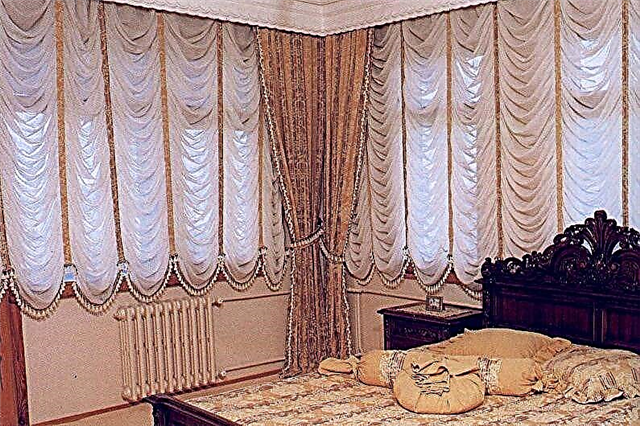
- With the onset of cold weather, additional insulating means are installed inside the greenhouse. It can be blinds, shutters, curtains made of soft heat-insulating materials.
- It is worth taking care of the insulation of the foundation. A rather large heat transfer occurs through the soil.
- A strong wind contributes to the intensive cooling of the greenhouse.Therefore, the structure must be protected from wind exposure by any structure (fence, other building, dense hedge).

Water supply
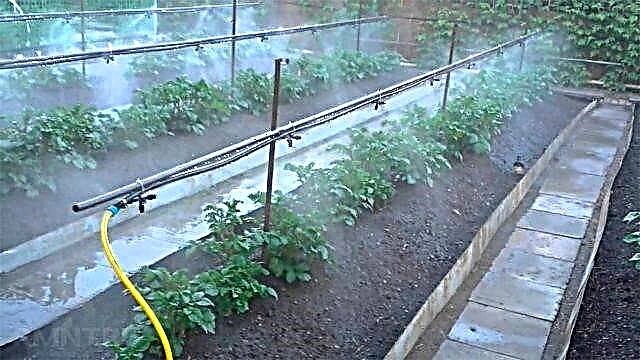
In the case of growing plants and crops in a closed-ground structure, one does not have to rely on natural rainfall. Therefore, you need to organize watering of the plant yourself. In a small greenhouse, it’s quite possible to get along with a watering can. But all the plants planted in large area constructions are not so easy to water manually. The best option for watering plants in closed ground is a drip irrigation system. To equip it, you will need a tank for water intake, plastic pipes and flexible hoses.
A drainage system that delivers moisture to the roots of plants is arranged according to the pattern of beds. And the capacity from which water will be taken for irrigation should be installed at a certain elevation. This is necessary to create pressure in the irrigation system. The big plus is that drip irrigation can be fully automated. To do this, the entire system is connected to an automatic timer or computer. Irrigation of the soil will be carried out strictly according to the specified parameters.
Garden beds and shelving
The improvement of the internal space of the greenhouse for various types of plantings is a very important point. The arrangement of beds or shelving should be arranged so that the stands are in favorable conditions for their growth and maturation.
However, do not forget about the design of the interior space of the greenhouse design. Design that pleases the eye will undoubtedly contribute to a good mood and pleasant emotions while working in the greenhouse.

How to arrange?
Arrangement of the structure from the inside includes a breakdown of the beds. First of all, the location of the areas under plantings will depend on the size of the greenhouse and on its position relative to the sun. It is also worth considering the characteristics of crops and plants cultivated in closed ground.
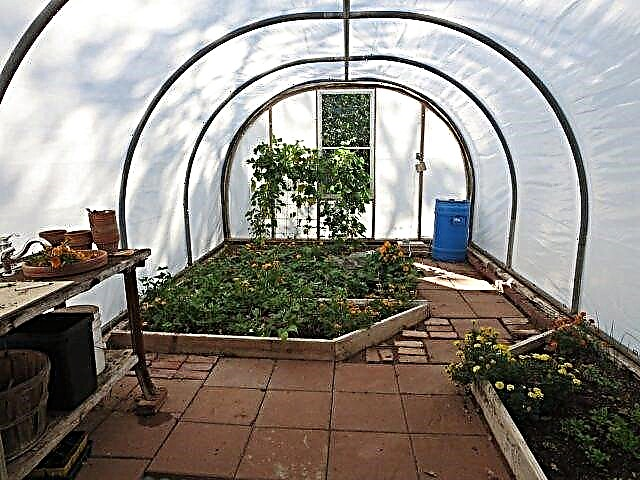
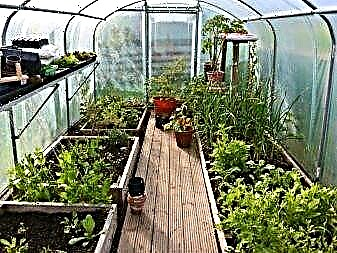
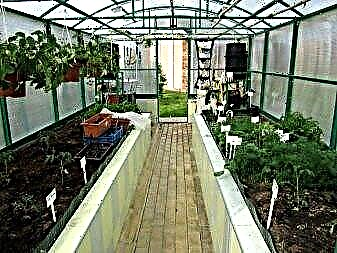
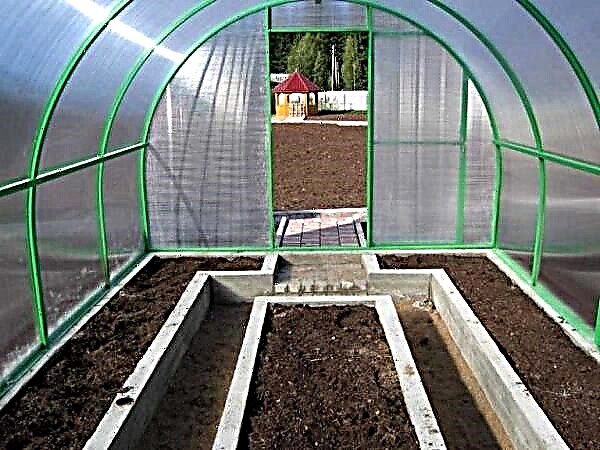
For small greenhouses (up to 3 meters wide), the most convenient option is to equip two parallel beds adjacent to the side walls. A path separates the middle of the bed. The width of the areas with plantings should be about 100-120 cm. In this case, unhindered access to all plants will be possible.

A rectangular greenhouse with a width of 4 meters can be divided into 3 or more parallel beds. Between the beds are also arranged paths for passage. It is advisable to plan the space so that the tracks are at least 40 cm wide, otherwise the passage through them will simply be inconvenient and difficult.
In a square-shaped greenhouse, beds can be arranged in parallel rows. Another quite convenient option in this case is the arrangement of plots for plantations along the walls of the greenhouse structure. Another planting zone remains in the very center of the greenhouse. The path leading from the entrance frames the central area with plantations and at the same time allows access to plants planted on beds along the walls.
What to make of?
It is very undesirable to leave the paths earthen, completely uncoated.
Tracks can be equipped using the following materials:

The beds need to be done just above the level of the paths. And so that they do not crumble and sprawl, their edges should be strengthened. This can be done by constructing mini-hedges on the sides.
The easiest and most affordable option is to lay boards. The board that is necessary in width is installed on the edge along the edge of the bed and digs into the ground. To further strengthen such a forming fence, small pegs can be driven next to the board so that it can rest on them.
More reliable, but time-consuming is laying out curbs of brick or small-sized concrete blocks.
If plants are grown in containers, crates or pots, the construction of shelving for them will be required. It is worth noting that this is a very convenient method of cultivation. In addition, shelving structures with plantings look very aesthetically pleasing. Moreover, the shelves can be arranged in several tiers, thereby increasing the number of plantings, and, consequently, the yield.
Installation of shelving will require leveling and strengthening the floor in the greenhouse. It can be laid out with any durable material, such as brick or tile. A durable and reliable option is to fill the surface of a pre-leveled floor with concrete.
The racks themselves are made of wood, steel or metal. For greater stability, their legs can be fixed on the floor, filled with concrete.
Good examples
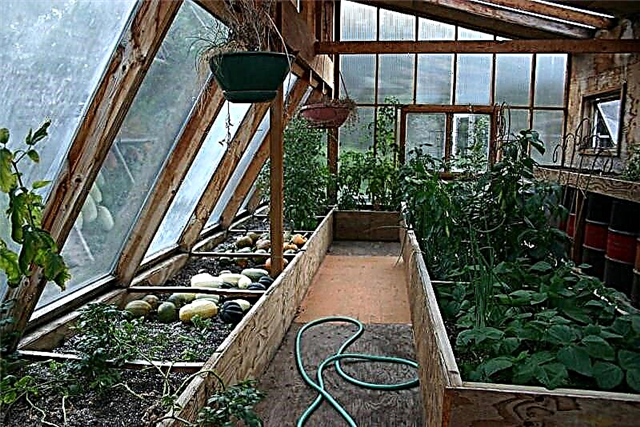
You can equip the interior of a large greenhouse by combining beds and shelving.
For low plants, a multi-level construction of shelves is constructed, which can be located above the earthen beds.
The tracks can be designed in Japanese style using large flat stones.
In the winter greenhouse, they often equip a kind of “vestibule” or “canopy”. This is a small space that separates the entrance from the premises with plantings. "Tambour" prevents the loss of heat in the cold season.
About how to equip the greenhouse inside, see the next video.
How to make a drawing?
When drawing up a drawing of a greenhouse, the layout of plants is important
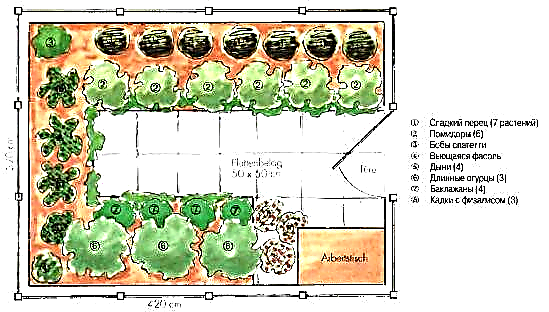
An example of the location of plants in a greenhouse
Therefore, the first thing to do is distribute the cultures within.
Greenhouses are distinguished by the shape of the frame structure and manufacturing materials. The shape of the frame of the building can be:
- with a pitched roof,
- in the form of an arch (with a roof in the form of a semicircle),
- in the form of a house or tent (with a gable roof).
For the construction of the frame, you can use the following materials:
- wooden blocks
- plastic profiles
- PVC pipes
- metal profiles.
The design of the greenhouse will depend on the type of crops that are planned to be grown. In addition, the dimensions of the structure also play a role. For polycarbonate, there are no restrictions on the choice of molds. The material can easily be mounted at an angle or bent. In the process of creating the drawing, you need to take into account the type of foundation of the greenhouse, which will depend on the type of soil on the site.
On the diagram, you need to specify the shape and dimensions of the structure, as well as the number of building materials:
Drawing of the greenhouse from shaped pipes
It is necessary to adhere to a certain sequence and take into account such nuances:
It is recommended to start drawing up a diagram from the base of the structure. After this, the frame and coating are indicated.
Choosing a place for a greenhouse
It is important to choose an open area where there is direct sunlight. It is not allowed to place a greenhouse near tall barriers, trees or buildings
It is best to place the building from west to east. In this case, the crop will receive the maximum amount of sunshine.
Accounting for loads. During the preparation of the project, future loads on the frame structure must be taken into account.
Calculation of the distance between the beds. It is important to consider that a few cm will be spent on building materials.
Need to calculate additional sashes. It is necessary to indicate the number of windows and doors and calculate the required amount of building materials.
It is possible to draw up a diagram for the future greenhouse on your own, but it is important to consider all the nuances. For example, wood is afraid of moisture, which forms a lot
An example of a drawing can be seen in the image:
Polycarbonate Greenhouse Drawing
If you plan to build a seasonal greenhouse, the scheme must provide for the possibility of its rapid dismantling.
What size should a greenhouse be?
Many summer residents believe that it is best to make a greenhouse from large-sized cellular polycarbonate. Each greenhouse has 3 dimensional indicators. Each of them has its own meaning. When determining the dimensions, you need to consider the following nuances:
The length of the structure is the most important indicator. To a greater extent, it depends on the preferences of the summer resident and the amount of prepared material that will be necessary for the construction of the frame, foundation and walls. Factory greenhouses have a length of 120 cm. The value corresponds to the standard length of a polycarbonate sheet. To choose the size, you need to decide how many pallets are planned to be placed on the shelves. The standard pallet has dimensions of 28x53 cm. To calculate the number of elements, it is necessary to choose indicators that can be divided by the number 28 or 53. It is not recommended to build a greenhouse of large length, since it is quite difficult to maintain the required microclimate in it. In addition, in winter, a large greenhouse is difficult to heat.
The width of the greenhouse. From this value will depend on how comfortable the landings in the structure will grow, as well as perform the necessary work for the summer resident. It is convenient to work in a wide product, and the probability of damage to plants is minimized.
Height. It can be any. It depends solely on the shape of the structure. Roof arches must be inclined so that snow and water do not accumulate
It is only necessary to pay attention to the choice of height if it is planned to grow tall trees. The standard height is 180-200 cm
Above the plants should remain approximately 50 cm of space above.
To determine the width of the greenhouse, it is important to consider the following nuances:
- the minimum width of the door is 56 cm,
- the maximum width of the shelves is 97 cm,
- minimum distance between racks - 60 cm.
Based on this, we can conclude that the minimum width of the structure is 240 cm.
How to issue beds
How to equip a greenhouse inside, where to start? Properly located beds will help to equip the greenhouse in the right way, an example is presented in the photo. Many people think that the beds can be arranged as you like, if only it would be nice and comfortable for the gardener to collect the fruits. But this is a general misconception. If you equip the beds anyhow, the crop may not grow at all.
There is another option for the design of beds. The beds can be nicely positioned around the world. Many gardeners have beds from north to south, which is correct. But it turns out that not all plants fit this arrangement. The location of the beds from west to east is the most advantageous setting. In this case, ultraviolet rays from morning to evening fully illuminate the plants, which gives them the opportunity to grow much faster.
How to create a fertile layer
In greenhouse conditions, sensitive and demanding crops are usually grown. Such plants are very whimsical to the soil. Also worry about their safety. Raise the beds above the soil (20 cm). To frame, build a border from the boards:
- Take the boards (width 25 cm).
- Put them on the edge.
- Dig from the side of the aisle the pegs that will hold the structure.
- Fasten the boards in an upright position. To do this, nail to the frame or make another row of pegs from the inside of the garden.
- Lay a layer of soil (thickness 25 cm).
Fertile layer. Illustration for the article is used under the standard license ofazende.ru
Use the finished substrate, which is sold in garden stores. You will be able to choose a mixture for the specific crop that you plan to grow. If it is not possible to purchase store land, clear the soil on the site of weeds and carry out a series of manipulations aimed at disinfecting it. This can be done by steaming:
- Take the enameled bucket.
- At the bottom, lay an inverted container made of plastic (do not forget to make a lot of holes in the bottom).
- Fill with water (pour about 2 L).
- Put on fire. Boil for at least 1.5 hours.
Each culture differs in its requirements for the soil mixture, so it will have to be prepared taking into account these features. It is unacceptable for different vegetables to be grown under the roof of one greenhouse. If it is not possible to install several greenhouses, divide the plants in the greenhouse with high partitions.
Arrangements of beds in the greenhouse 6x3 m
In pursuit of a large crop, gardeners are trying to use every inch of the greenhouse.
Wide beds make it difficult to care for plants.
There are the most common ways to arrange beds:
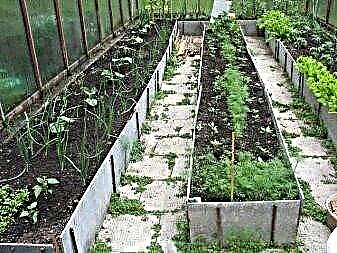
- 2 wide ridges that stretch from beginning to end of the structure. The width of the seats will be 1.2 m, and the width of the track will be 60 cm. With this option of landing there is one minus, for some it will be difficult to get to extreme crops.
- 3 identical beds and 2 paths of 60 cm each. In this case, the planting area will slightly decrease, but convenient plant care will be provided.
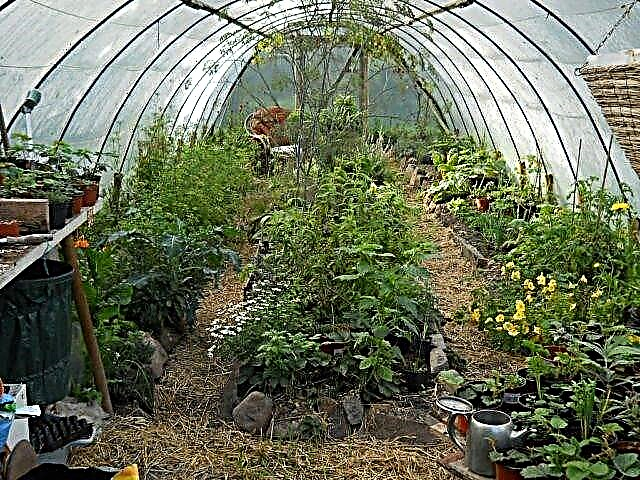
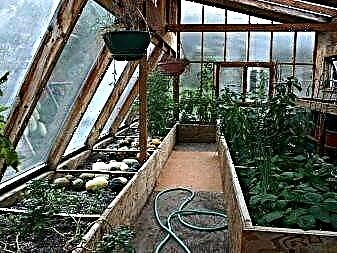
- A bed, more than a meter wide, should be let out in the center, with approach from both sides. In greenhouses with a similar layout, plants will receive the greatest amount of light and heat, but the size of the usable area will remain small.
- You can arrange narrow landing rows along the entire perimeter of the house, and one wide in the center.
 One of the options for the location of beds in the greenhouse
Neat beds in a polycarbonate greenhouse: photos and examples Garden beds: placement features What should be the soil for tomatoes in the greenhouse? We make the right soil in the greenhouse: 4 main types
The decision of the layout of the greenhouse depends on the selected vegetable crops. Each plant has its own microclimate in which it will fully develop. Select plants for the neighborhood should be with similar growing conditions.
Heating and heat saving in the greenhouse
Plants grown in a greenhouse may need additional heating. You can heat the greenhouse in different ways:
- gas
- a stove (firewood, coal or peat can be used as fuel),
- by electric radiators (a ventilating device for the distribution of warm air will be required),
- a boiler
- solar installation (device for collecting solar thermal energy),
- fuel of vegetable or animal origin (manure, sawdust, compost).
Watch out for temperature conditions. Illustration for the article is used under the standard license ofazende.ru
- Water. If you fill it with containers made of plastic or metal, it will accumulate heat and slow down the process of its return. To enhance the effect, paint them dark.
- The soil. Artificial heating of the earth in the greenhouse will increase the temperature of the air in the greenhouse.
- The stones. The cobblestones that are on the bed at the edge of the greenhouse will be heated by the sun in the daytime, and at night they will give off thermal energy to the air. To heat the stones, you can use heat guns.
The greenhouse inside the greenhouse: how to divide the space
Many beginner gardeners are wondering. Is it possible to grow different cultures together. Specialists will unequivocally answer that this is impossible. For example, you can take cucumbers and tomatoes. Cucumbers are adapted to a more humid environment, so they will require the creation of a separate greenhouse in the greenhouse. While placing tomatoes in a greenhouse with cucumbers will lead to the coalescence of pollen, and as a result to a low yield or lack thereof.
What to do if space does not allow to create a separate greenhouse? Some plant crops separately, accepting that it is impossible to create conditions and lose some crops due to the productivity of others. Other gardeners find a way out of the situation in a completely different way, simply using the competent distribution of space.
 In order to grow several crops at the same time, you can arrange a greenhouse in the greenhouse
By equipping a greenhouse, you can do the following work, just separate one plant from another. For this, polyethylene is mainly used.In this version, tomatoes that love heat more can be placed on the sunny side, and cucumbers in an impromptu greenhouse, where there is high humidity.
This recommendation will help divide the subsoil regime and grow several crops at the same time without sacrificing a particular plant.
Basic principles of preparing a greenhouse
When the greenhouse frame is assembled and fixed on the ground, the film, glass or polycarbonate are decorated in a sealed coating, ventilation is thought out and implemented, you can begin to equip the greenhouse. The task of the grower is to create a favorable and stable atmosphere for crops. The key nuances of this process include:
- support for optimal thermal conditions,
- breakdown of beds,
- layout, choice of coverage and placement of paths in the greenhouse,
- creation of a fertile soil layer with a specification for different crops,
- shelving construction (if necessary),
- preparation of devices for shading the southern wall.
Country greenhouse 3 by 6: how to arrange the beds
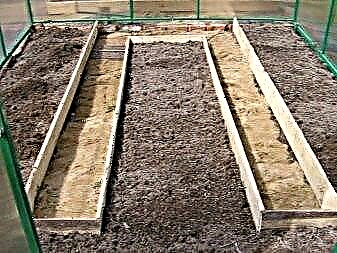
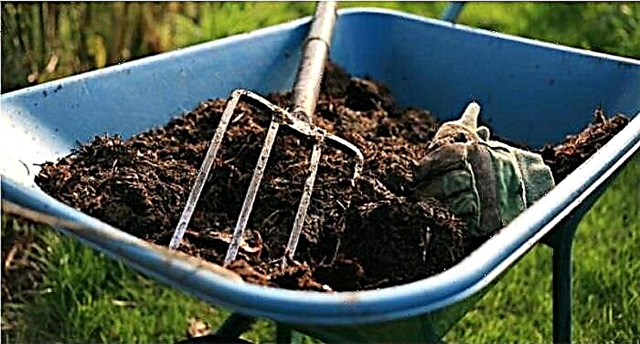
Depending on climatic conditions, gardeners decide at what height a warm bed needs to be raised. The height of the ridges varies from 20 to 50 cm. With this arrangement, convenient access to plants remains and there is no quick drying of the soil. For the device, for the boards they use boards, bricks, polycarbonate sheets, pieces of slate, which interferes with the crumbling of the earth. All kinds of waste is laid at the bottom of the beds: straw and leafy fillers, rotten bark of trees, dust, wood chips. All this is poured with boiling water to start the fermentation process and covered with manure on top. When rotting, heat begins to be released, this affects the growth rate and scale of the culture.
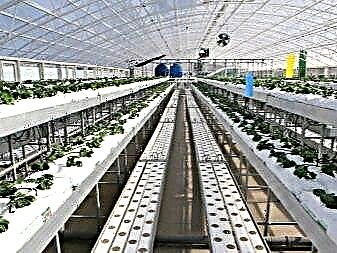
For efficient use of the area, you can apply the vertical method. Vertical beds save space and help to get at least a rich harvest.
 In the country greenhouse, the beds are best arranged vertically
There are several ways to install such designs:
- Garter beds. They are made specifically for crops that require tying to a support. Various shields and partitions, plastic nets serve as a vertical surface. Growing plants begin to cling to the support and reach up.
- Garden shelves. They represent a construction of several boxes placed one above the other. The height between the shelves depends on the crop grown. Such shelves are good for growing low plants with a superficial root system.
- Garden beds made of plastic pipes. Holes are drilled in the pipe, the earth is filled up, and the structure is installed vertically in the greenhouse. It is very good to grow strawberries in such devices.
Vertical beds have their own nuances, which every gardener needs to know about.
In such mini-beds, the soil dries much faster and requires constant feeding, but less exposed to infection. It will be a special pleasure for gardeners to take care of plants without bending their backs. A competent approach to growing a plant will give a rich harvest, even in a small area.
We break the area into beds
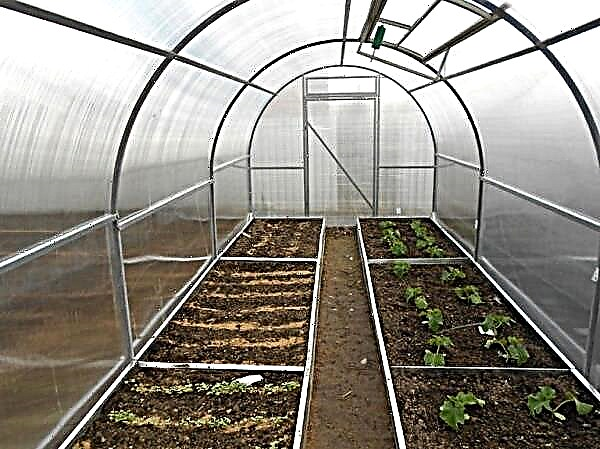
Given the area of the greenhouse 3 * 6, the land is divided into two or three beds, as shown in the photo. The width of each 1.2 meters. With such dimensions, it is convenient to care for plants planted in the garden. If you make a width of more than 1.2 meters, then reaching out to distant shoots will be very problematic. With wide beds, the gardener will have to step on the ground, thereby compacting it, worsening the process of oxygen circulation. Therefore, the recommended indicator of 1.2 meters is the maximum. The beds may be narrower, but not wider.
If the area of the greenhouse is 4 * 9, it can be divided into three beds. Two of which will be one meter wide, and the central one and a half meters
It is very important to build a track with a width of 0.5 meters for garbage removal and watering. Optimum width - 70 cm
It does not make sense to occupy a large area. Indeed, in this case, the useful part of the soil will be used for nothing.
Placement of beds in the greenhouse
The size and location of the ridges in the greenhouse depend on its size. Greenhouses of industrial production can have different widths, usually it varies from 1.8 to 3.4 m. On farms, greenhouses of greater width are used - up to 6 m. The length of greenhouses is always a multiple of 2 meters, this is due to the standard sizes of polycarbonate sheets. The most common greenhouses are 4.6 or 8 m long.
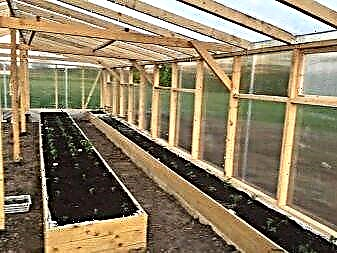
When the width of the greenhouse is 1.8-2.4 m, two beds are usually located inside, separated by a track. In this case, the width of the ridges is from 0.6 to 1 m. The width of the path must be chosen so that it is convenient to move along it with garden tools.
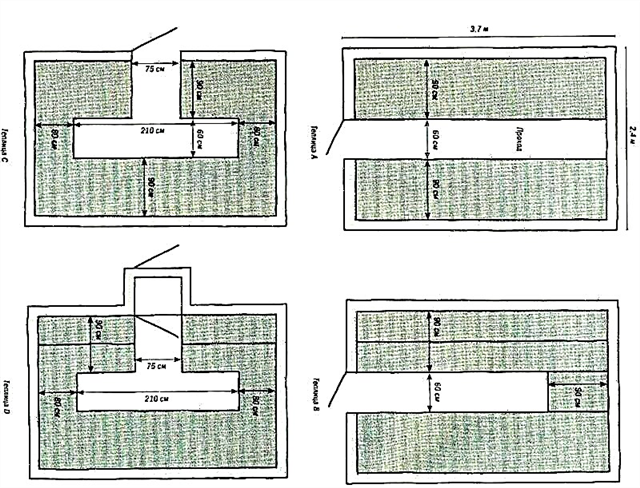 Possible greenhouse layout options
Polycarbonate Prices
The width of the greenhouse of 3 m or more allows you to place three beds with paths between them.
In this case, use the following layouts:
- three ridges of the same width,
- a narrow ridge in the center and two wide along the walls,
- a wide ridge in the center and two narrow along the walls.
When the length of the greenhouse is more than 6 meters, it is advisable to make a passage in the center of the middle garden. The basic layout of ridges in greenhouses is described below.
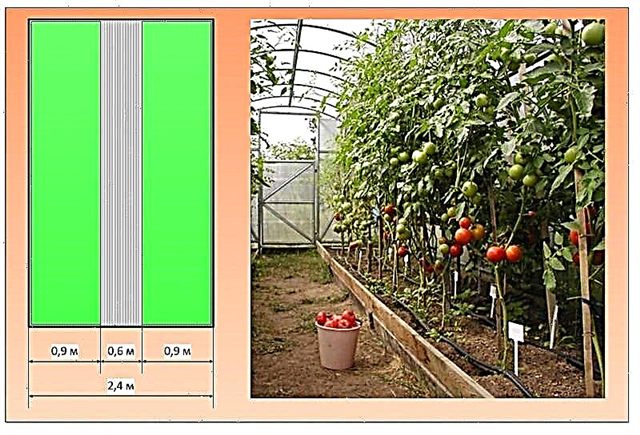
Greenhouse 2.4 meters wide with two beds
The beds in such a greenhouse are placed along the side walls, the passage width of 0.6 meters allows you to freely move with a garden tool and a wheelbarrow. The width of the ridges is the same and is 0.9 m. On such ridges you can place two rows of tomatoes, peppers or eggplant. Cucumbers are placed in one row.
 The layout of the ridges
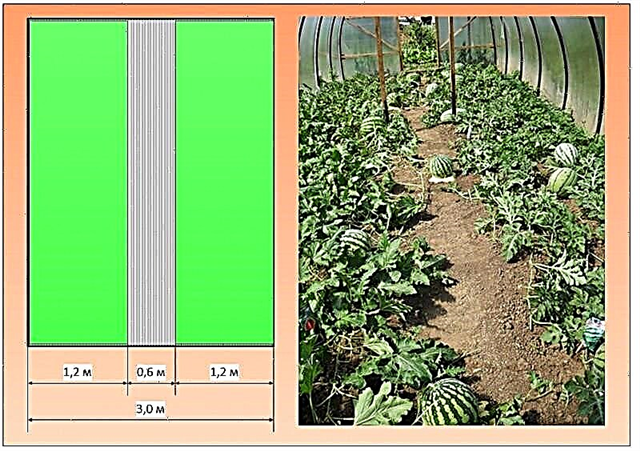
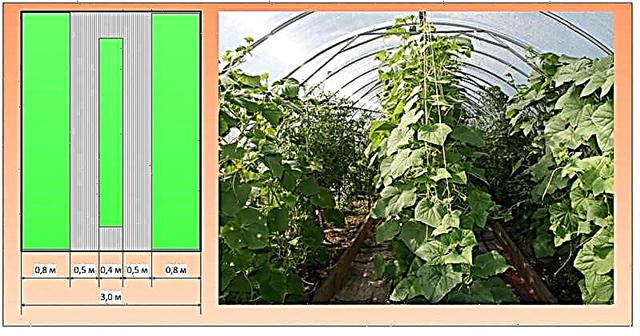
3 meter wide greenhouse with two beds
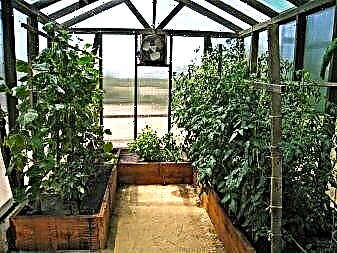
The width of the ridges with this layout is from 1 to 1.2 m. With a large width of the ridges, the usable area in the greenhouse is maximized, but caring for the plants is complicated. Tall plants in this arrangement will obscure each other, and access to them will be difficult.
Such a layout is appropriate for plants with an extensive root system and sprawling bushes, for example, for melons: watermelons, melons, pumpkins with a horizontal arrangement of lashes. In this case, the illumination of the plants will be sufficient, while the lashes will not hang on the tracks and interfere with walking.
 The arrangement of ridges in a greenhouse 3 meters wide
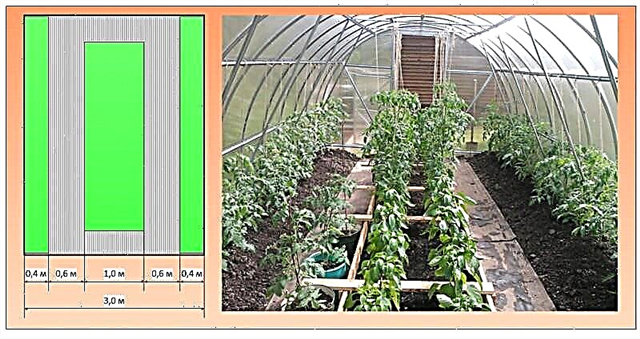
3 meter wide greenhouse with three beds
In a greenhouse with three beds, you can place not only one, but also several crops at once. At the same time, by varying the width of the beds, you can create the best conditions for each crop. The width of the ridges depends on the plants grown, their requirements for illumination and the area of root nutrition.
One option is a narrow bed in the center and two wide along the walls. At the same time, tall crops are usually planted in one row in the central bed, and low-growing in two rows on the side beds. Even in this case, it is possible to achieve good illumination of each plant and provide free access to them for care.
 Arrangement of ridges in a greenhouse 3 meters wide (first option)
The second option is a wide bed in the middle of the greenhouse and narrow along the walls. At the same time, the approach to the middle bed is ensured from two sides, which makes plant care even more convenient
With such a layout, it is important to properly form the plants so that they do not obscure each other. The average ridge can be raised half a meter higher relative to ground level, equipping a warm bed - this will help to get an early crop
 The arrangement of ridges in a greenhouse 3 meters wide (second option)
There are other options for placing ridges and tracks, allowing to increase the area of planting. For example, the entrance to the greenhouse is made only on one side, and a bed is placed along the second end wall.
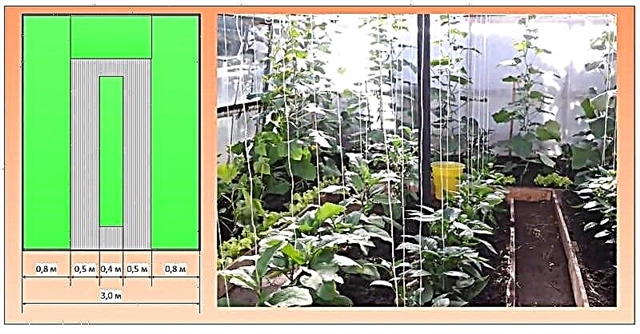 The arrangement of ridges in a greenhouse 3 meters wide (third option)
Functional layout of the greenhouse 3x6
The interior of the greenhouse is not in vain called a gold resource. It must be used with maximum efficiency, taking into account the type of crops grown.
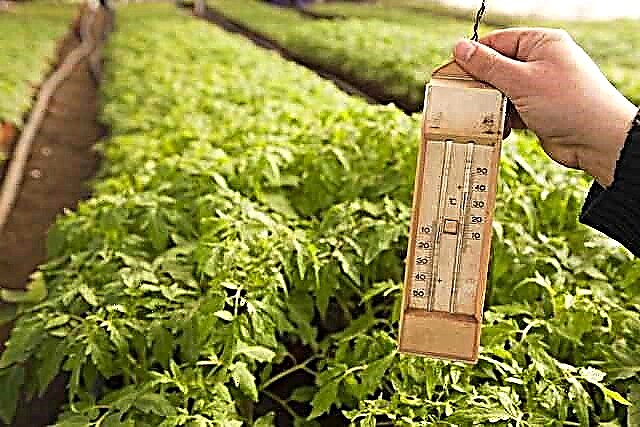
Do not forget about the ventilation system and temperature control. Radish and tomato require at least +25 oС on the Celsius scale. In the event that sudden frosts are observed in the region, it is advisable to think about additional warming.

In addition, a Coveriteco greenhouse or other polycarbonate model requires consideration of the nuances listed below:
- For year-round use, it is imperative to install a small hallway that does not allow cold air to immediately reach the seedlings,
- Heavy rainfall during the year requires the installation of a 2-pitched roof, otherwise snow and water will constantly accumulate on the surface,
- Before you begin assembling the entire structure, you must make sure that there is a strength marking on the polycarbonate sheets.
Each centimeter of the greenhouse should be used rationally. Despite the fact that the 6x3 model is relatively inexpensive, in functionality it is not inferior to analogues. A gable roof does not allow precipitation to accumulate, and a 2-layer polycarbonate film protects seedlings from temperature shocks. The internal space allows you to delimit the beds.
Walkways and beds
When determining how to equip a greenhouse from the inside, it is necessary to study the organization of beds and paths. These are the main elements of the greenhouse.
The beds are often placed along the walls. Then the path will pass in the middle of the building. In this case, if the greenhouse is not wide, a hand with a watering can will reach to either end of the garden. Also, areas intended for growing plants can be organized around the world. Then they can be divided by two paths running perpendicular to one another. The most advantageous arrangement of the beds is their direction from west to east. It suits most vegetable crops.
If the greenhouse is large in size, then two parallel paths can intersect the area with plants. You can make paths in different ways: just lay them out with boards or bricks, fill them with concrete, etc. The beds should be fenced off from the paths using high sides. Although some gardeners just make clearly visible paths or use other delimiters.
As you can see, the arrangement of the greenhouse inside is not an easy task. But the comfort of the gardener when growing vegetable crops directly depends on the correct organization of the internal space of this structure.
Video: growing crops on racks
Shelving equipment inside the greenhouse does not have to be complex and bulky. See how strawberries can be grown on small pyramidal racks from improvised material, and fill the remaining free space with bales for grape seedlings.
Video: Strawberries on shelves and grapes in bags
The following video explains in detail how to grow berries in vertical structures - tubes. And another interesting technology demonstrates the possibilities of using racks for growing radishes in egg trays.
Video: What are the pipemen in the greenhouse
Video: How to grow early radishes on a rack
How are beds made?
The first layer is laid out drainage. It is necessary to retain moisture. Under the drainage, you can put a layer of polyethylene, then heat and moisture will be better retained in the ground.
The second layer is poured soil. Before you choose it, you need to decide on the type of future plants. For some crops, it is better to fill in sandy loam soil, for others it will be more fertile turf.
For the rational use of space and increase productivity, there are some tricks of arrangement in the greenhouse. In addition to conventional beds, the greenhouse can be equipped with shelving type beds. As a rule, multi-tiered racks are installed.
The racks are placed only on a flat, strong floor that can withstand heavy weight. Therefore, it is better to make a concrete or brick floor.
Choose a polycarbonate greenhouse
The key to successful operation, the benefits of the purchase and the possibility of independent delivery / assembly of the greenhouse will largely depend on the correct choice. Therefore, before you go to the store and purchase a greenhouse, we will familiarize ourselves with the basic principles of choosing this design.
 Polycarbonate Greenhouse Selection
First, decide for what purposes you need a greenhouse and what you are going to grow in it, in what quantity - the type of structure and its size will depend on this. If you have a small summer cottage, and you plan to cultivate only a few bushes of tomatoes and cucumbers "for yourself", then there is no point in acquiring a huge structure - you still will not use it completely. If you decide to engage in the vegetable business, then you will have to buy a greenhouse not only large, but also insulated. And this will affect both its price and the complexity of the installation - it is not always possible to assemble such a design yourself.
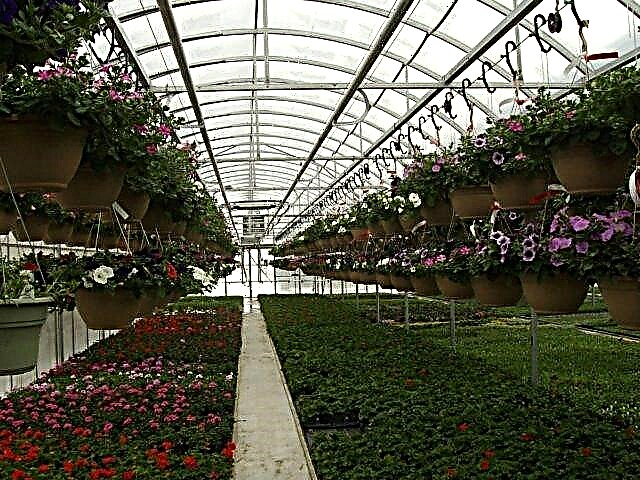
 Polycarbonate Farm Greenhouse
 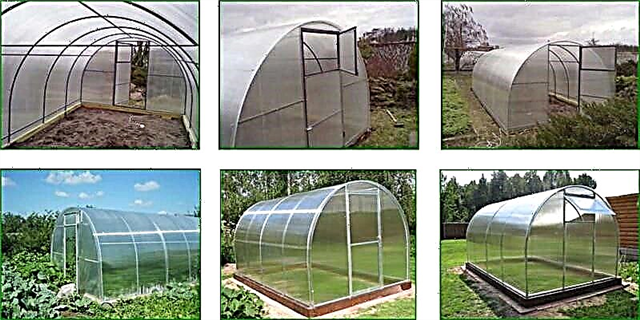 Polycarbonate greenhouses
A good greenhouse must be durable - this is known to every gardener. But I don’t want to spend big money once again either. Therefore, consider in which climate zone you live. If you don’t have strong winds and snowfalls in the region, then you should not buy a reinforced structure, which is much more expensive than the standard one, and also is difficult to assemble due to the large number of additional parts. In a region with strong wind and snow loads, on the contrary, it makes no sense to buy a standard greenhouse - here you just need a reinforced one so that in winter it does not collapse under the weight of snow on it. By the way, the strength of the greenhouse depends largely on the shape of the roof.
 The strength of the greenhouse is largely dependent on the shape of the roof
Table. Types of greenhouse roofs.
| The form | Characteristic |
|---|---|
 | The usual arched roof. Allows snow to roll relatively easily from the surface (but sometimes it can still linger on the roof). The frame of such a greenhouse is often assembled from solid-curved, rather than composite arcs. |
 | Such a roof used to be constantly made in ordinary wooden greenhouses. And the greater the angle of the ramp, the better the snow rolls in winter. However, if the slopes are too steep, the greenhouse is either very high or with low side walls, which makes it difficult to carry out work inside it. Arcs, as a rule, consist of two joined parts. |
 | Combination of arched and gable roofs. The best option. On a roof that resembles an arrowhead shape, snow rolls easily. Such greenhouse structures are less likely to be damaged due to heavy snow or wind loads in winter. Arcs usually consist of several parts joined together. |
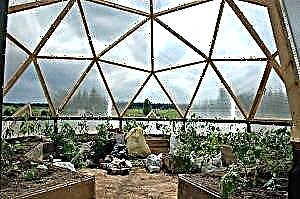 Pyramidal or domed | More exotic forms of greenhouses. One resembles a ball of honeycombs, the second repeats the shape of the Egyptian pyramids. Difficult to build with your own hands, but very durable and beautiful. |
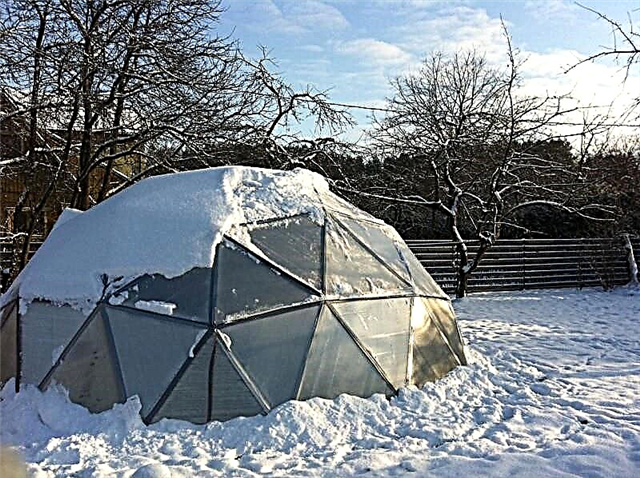 Dome Greenhouse
  The device of the pyramid greenhouse
When choosing a greenhouse, one should not forget that strength and durability will be affected by such factors as the thickness and coating of the metal profile, the density and thickness of polycarbonate sheets, the distance between the main arcs and much more
Do not forget to pay attention to the quality of polycarbonate.
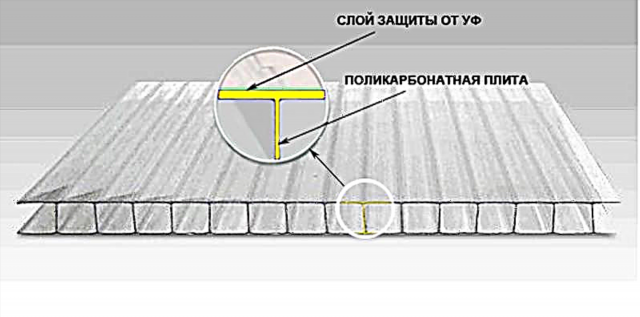 Cellular polycarbonate with a protective coating
Cellular Polycarbonate Prices
Also, if possible, try to choose a greenhouse, in the frame of which there are fewer components - the more solid parts, the stronger the structure. And do not forget about the coating of the frame - metal galvanizing is much better than painting. If you believe the reviews of experienced gardeners, then the paint often peels off (especially in places where the parts are joined) and it has to be tinted annually to avoid premature corrosion.
 Polycarbonate greenhouse on a stone foundation