If you started to repair and decided to whitewash the ceiling, this article is for you! Today, the market offers us many different finishing methods: suspended and suspended ceilings, ceiling tiles, GKL-designs. But, of course, whitewashing is the most environmentally friendly and affordable option. And, importantly, he will not steal precious centimeters from you. Before starting work, you need to determine the material. A mixture for whitewashing is based on lime and chalk. Which is better to choose?
p, blockquote 1,0,0,0,0 ->
p, blockquote 2.0,0,0,0 ->
Lime whitewash ceiling
Such a solution is suitable even for cold and humid rooms, as the lime layer contains pores, which contributes to quick drying. If there are small cracks on the surface, lime will hide them. It has a powerful antibacterial and disinfecting property, resists the appearance of fungus and mold. Therefore, it is perfect for utility rooms with high humidity, in which disinfection is necessary: basements, sheds, outbuildings. The calcareous surface does not smear. After the end of work there will be no problems with cleaning. Everything that hit the floor can easily be washed off with water, leaving no stains. Such coverage will last quite a long time - about 4 years.
p, blockquote 3,0,0,0,0,0 ->
But it is worth considering that lime can cause allergic reactions, so it is better for people with allergies to not be in such rooms.

p, blockquote 5,0,0,0,0 ->
Chalk whitewashed
Chalk-based mortar can be used exclusively in warm and dry rooms. Unlike lime, the chalk layer does not have the pores necessary for drying. The surface, whitewashed with chalk, looks more dull, the color is deep and saturated. The flip side of this effect is that the surface smears. The coating lasts 1-2 years, after which it is necessary to whiten again. Traces on the floor after work are difficult to wash. Remember at least a blackboard, which, as long as you don’t wash, still remains white. Small cracks and irregularities, unlike lime, chalk will not hide. But there is one significant and important advantage: chalk is a hypoallergenic material, it passes all the most stringent sanitary and hygienic requirements. Therefore, if you have an allergy, then the best material simply can not be found.
p, blockquote 6.0,0,0,0,0 ->
With the advantages and disadvantages of the two solutions, we figured out. Which one to choose is up to you. What will we do next?
p, blockquote 7,0,0,0,0 ->

p, blockquote 8,0,0,0,0 ->
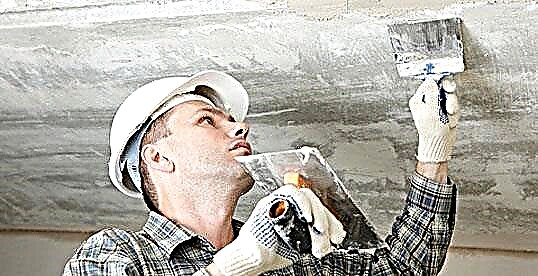
Preparing the ceiling for whitewashing
Before starting work, all possible furniture must be taken out of the room, as drops and smudges cannot be avoided. That which cannot be carried out, cover with newspapers. We begin to clean the ceiling. If before that he had been whitewashed with lime, then a calcareous and chalk solution will lie well on such a surface. If the ceiling was whitewashed with chalk, lime will not take it. No cleansing and priming will help. Only chalk can be put on chalk.
p, blockquote 9,0,1,0,0 ->
Necessary tools
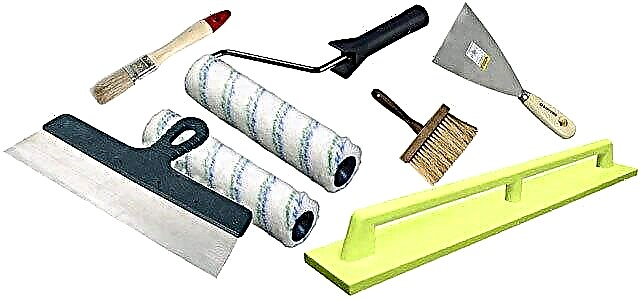
In order not to rush about in search of the right tool, prepare everything in advance. You will need:
p, blockquote 10,0,0,0,0 ->
- wide brush (15 cm) or roller,
- narrow brush (5-7 cm),
- plastic container
- stepladder or table
- rubber gloves,
- old newspapers, rags.
Depending on the situation, you may need:
p, blockquote 11,0,0,0,0 ->
- spatulas
- sponges
- serpyanka,
- sandpaper.

p, blockquote 12,0,0,0,0 ->
How to find out what was painted on the ceiling before
Swipe your finger across the surface. If there is a white trace on the finger, then this is chalk. If not, this is lime. If you still doubt, moisten a piece of cotton wool in lemon juice and apply to the surface. The chalk will hiss, but the lime won't.
p, blockquote 13,0,0,0,0 ->
No matter what the coating was, it must be treated. To do this, we wipe the entire ceiling with a wet rag. Thus, we eliminate dust and white coating.
p, blockquote 14,0,0,0,0 ->
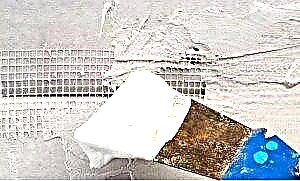
What to do with cracks
If there are large cracks on the ceiling, they must be putty. Please note that cracks are not easy to cover. After drying, the putty will crack. Therefore, it is necessary to impose a sickle. Serpyanka is a mesh in a roll 3-5 cm wide (the width can be different). With the help of a sickle, cracks are closed, joints in drywall. In general, all elements that violate the integrity of the surface. The fact is that the crack inside contains air and there is nothing to putty on in this place. While we apply it, it is crude and it seems that everything has been smeared. But after drying, the cracks will appear again. Therefore, we unwind the tape from the roll and seal the crack. Serpyanka on one side has an adhesive surface, so it is easy to stick. Then, using a spatula, apply putty. Only in this case, the crack does not appear again.
p, blockquote 15,0,0,0,0 ->
Do not be afraid that it will turn out not very smoothly, then all this can be erased. Putty drying time depends on humidity and room temperature. If you live in an ordinary apartment, it will take a day. In any case, you can determine the level of drying yourself. Well, in the end we grind all the bumps with a simple sandpaper.
p, blockquote 16,0,0,0,0 ->
p, blockquote 17,0,0,0,0 - ->
How to remove stains
The neighbors have flooded or you live on the top floor, where the roof flows in the spring. As a result, yellow spots and smudges. You can not try to whiten them and even putty. It's impossible! If water-based paint can still cope with this task, then this is beyond the power of lime. But do not despair. There is, in fact, a way out. Ordinary whiteness or bleach will help us with this. Moisten a sponge in any liquid and apply to the stain. Just be sure to wear rubber gloves, otherwise it will instantly corrode your skin.
p, blockquote 18,1,0,0,0 ->
Primer for better application
We white, white in one place, and the solution does not seem to stick, and only droplets remain. So, to prevent this from happening, it is necessary to prime. The primer is a white liquid in a plastic bottle. In general, it is polyvinyl acetate glue diluted with water. But for convenience, it began to be released in finished form. This slurry is applied using a roller. Ideally, if you have a plastic basin or a wide plastic bucket (a large bucket from under the high-voltage paint is perfect). The main thing is that a roller should be placed in this container. The primer creates an adhesive layer. In other words, a thin film with micropores forms, to which the solution already adheres accurately.
p, blockquote 19,0,0,0,0 ->

p, blockquote 20,0,0,0,0 ->
How to dilute the solution
There are two types of lime: quicklime and quicklime.
p, blockquote 21,0,0,0,0 ->
Quicklime is sold in plastic packaging of various packaging and is a solid stony pieces, similar to chalk. In order to get lime powder from them, they must be extinguished. This is done as follows. For 1 kg of lime, 1 liter of water is taken and gradually poured. As a result of the quenching, lime powder is obtained. Lime is a very strong alkali.
p, blockquote 22,0,0,0,0 ->
When extinguishing, follow all safety precautions. It is necessary to wear a face mask, a plastic coat and rubber gloves, because everything will hiss, seethe and splatter.
Just in case, keep a solution of vinegar or citric acid next to you. If the mixture gets on the skin, the acid neutralizes the alkali and does not form a burn. It is best to extinguish lime in a metal container, because plastic can not withstand high temperatures and melt.
p, blockquote 24,0,0,0,0 ->

p, blockquote 25,0,0,0,0 ->
It is much easier and simpler to work with ready slaked lime. To get 10 liters of solution, you need 3 kg of lime. It is good if there is a large unnecessary metal container. We heat water in it so that it does not become warm, but rather hot. We add lime gradually, while mixing the solution so that no lumps form. Mix better with a wooden stick. In a separate container, mix the saline solution. We take any salt that is available and dilute 100 g per 1 liter of water. Pour it into the solution and mix.
p, blockquote 26,0,0,0,0 ->
In order that lime after drying on the ceiling does not acquire a yellowish tint, blue can be added. To do this, it must be separately diluted so as not to overdo it. The amount and concentration of blue you must determine for yourself, depending on the desired result. When everything is well mixed, the mixture needs to be filtered. This can be done with gauze or a nylon stocking. This is done in order to eliminate clumps of lime that have not dissolved. In another case, you risk decorating the ceiling with a relief decor.
p, blockquote 27,0,0,1,0 ->
You can also follow the instructions on the packaging, if any, as different manufacturers offer different technology for preparing the mixture, depending on the characteristics of the composition.
p, blockquote 28,0,0,0,0 ->

p, blockquote 29,0,0,0,0 ->
Ceiling whitewash technology
If you have a stepladder - great! If not, a regular table will do. It is even more convenient, because you can walk on it. It will take two brushes: wide (15 cm) and narrow (5-7 cm). You can, of course, use a roller, but since the solution is very liquid, all this will pour profusely onto the floor. In addition, the chance to gloss over without gaps with a brush is higher. Prepare some convenient container that you can hold in your hands. Large - for a wide brush, small - for a narrow one.
p, blockquote 30,0,0,0,0 ->
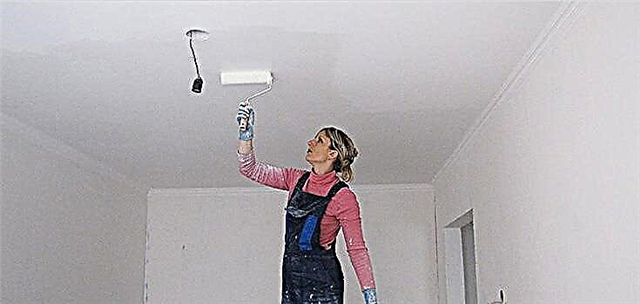
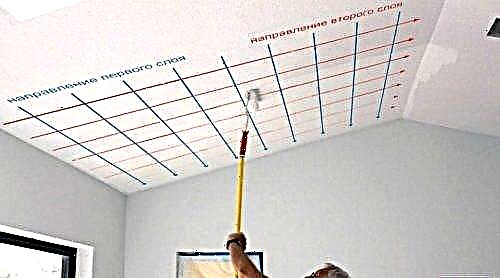
We start whitewashing from the window, since only in this direction of light will not be visible white space. First, we whiten along the perimeter the joints between the ceiling and the wall with a narrow brush. Then with a wide brush we whitewash the main area, starting from window to door. Movement should be in one direction. After whitewashing, the ceiling is damp, looks gray and ugly. Do not be afraid! As it dries, it will become whiter. After the first coat has dried, a second can be applied. In general, it depends on the neglect of the case. Perhaps one layer is enough. But if you decide to whiten one more time, then whit perpendicular to the direction that you whitened before. This will help prevent streaks and streaks. The whitewash dries quickly. In a dry, warm room for 3-4 hours.
p, blockquote 31,0,0,0,0 ->
Important! Close windows and windows. Ensure that there are no drafts in the room, otherwise everything that is not laziness will stick to the ceiling.
p, blockquote 33,0,0,0,0 ->
Ceiling painting with water emulsion
If you had lime with blue on your ceiling, you may not even try to whitewash this situation with lime or chalk. Nothing happens! Do not waste your time. No matter how many layers you apply, the blue will show through. Therefore, immediately take a water-based paint. She will paint over blue, and smudges, and any other defects. No one has come up with any more pleasant material for whitewashing. The advantage of a lime and chalk solution compared to an aqueous emulsion is only the price. But how much effort you need to spend to whitewash! Aqueous emulsion paint has many advantages:
p, blockquote 34,0,0,0,0 ->
- lack of dust during cooking,
- smoother surface due to thick consistency,
- the mixture is ready and it does not need to be bred,
- can be painted with a roller with a long handle directly from the floor,
- no need to paint on many layers,
- the ceiling will still be whiter than from lime,
- the coating is more durable.

p, blockquote 35,0,0,0,0 ->
If you decide to paint with an aqueous emulsion, the technology is the same as with whitewashing. First, along the perimeter, we pass the joints between the ceiling and the walls, and then with the roller, starting from the window, paint the main area in one direction. Unlike lime, the paint on the ceiling immediately has a white color. At ordinary temperature, the water emulsion dries 3-4 hours. Then, if desired, a second coat can be applied. But, as a rule, this is not necessary.
p, blockquote 36,0,0,0,0 -> p, blockquote 37,0,0,0,1 ->
We examined the advantages and disadvantages of various types of whitewash mixtures. Well, which one to choose is up to you.
Materials for whitewashing the ceiling surface
First of all, you need to decide what to whitewash the ceiling in the apartment, choosing one of the options. Each of them has advantages and disadvantages.
As for such a material for whitewashing the ceiling as chalk, it will give the repaired surface a radiant whiteness. Despite the fact that the room will have a good view, additional dust will appear in it. This is explained by the fact that the chalk will gradually begin to crumble. Also, this material is not waterproof, so it is not suitable for repairing the ceiling in the bathroom.
Whitening with lime is an excellent way to combat fungus. In the premises where he appeared, it should be used precisely. In addition, lime on the ceiling is resistant to high humidity. It can be used to paint the ceiling surface in any room, including the bathroom. Lime whitewash successfully conceals minor defects such as cracks and cracks.
Before whitewashing the ceiling with lime, it should be borne in mind that this material can cause an allergic reaction. Also, the surface is not perfectly snow-white, in contrast to the composition based on chalk.

The ceiling after applying water-based paint has an excellent appearance, it keeps well on the previous coating. The composition sticks to the old whitewash and does not begin to peel off over time. This paint has the only drawback - it is possible to carry out repairs when using it at a temperature of + 5 ° C. But, when painting the ceiling is carried out indoors, this fact does not matter.
If there is no desire to wash off the previous layer from the surface, then you should know that whitewashing the ceiling on the old whitewashing has a number of nuances. The fact is that chalk can not be applied to lime, as well as vice versa, otherwise a new finish layer will lie badly, as a result of which dirty stains will appear on the ceiling surface.
On top of the chalk solution, it is permissible to apply the same layer or water-based paint. If the old whitewash on the ceiling was based on lime, it can only be coated with the same material or emulsion coloring composition. In addition, it must be borne in mind that enamels or oil paints are not applied to the old chalk or lime layer.
Whitewashing tools
Before you whitewash the ceilings yourself, prepare the necessary tools - this work is done in one of three ways, for which they use:
- roller
- a spray gun, it’s a spray gun,
- a brush.
If painting is carried out with a roller, then the coloring composition will lie in an even layer, without forming spots and stains. To get a good result, whitewash is applied in two layers. You will need to have not only a roller, but also a container for a solution, an object for mixing, a paint tray and a small brush for applying paint at the point where the ceiling adjoins the wall.
A whitewash brush can be purchased at every building materials store at an affordable price. When using it, the composition is sprayed, so you should protect the room objects from it and use special glasses for the eyes.
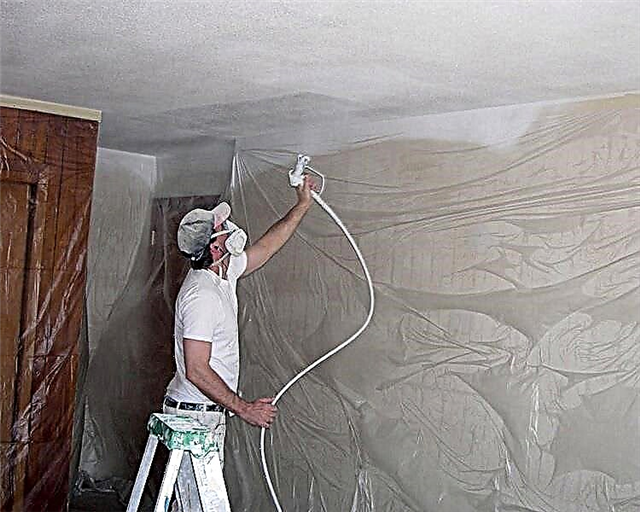
The use of a spray allows you to lay whitewash even, neat layer. Using a spray gun to whitewash the ceiling, you will reduce the time to complete the work. When using paint, make sure that it is free of lumps.Its consistency should be more liquid compared to whitewash, which is applied with a roller or brush.
The choice of water-based paint
If, deciding on the option, what is better to whitewash the ceiling, it is decided to use this type of paint, then you need to consider that there are many varieties of them, they differ in composition and properties:
- Polyvinyl acetate paints. They are the most affordable.
- Water-based emulsion with acrylic additives. The most popular. They are used for different surfaces, they are resistant to abrasion, but for ceilings it does not matter.
- Silicone paints. If the ceiling is whitewashed, it can be done without the use of a primer. This paint composition is distinguished by a high degree of vapor permeability, it is suitable for painting the ceiling surface in the kitchen or bathroom. Such paint can reliably protect the ceiling from fungus.
- Water emulsion with latex. They have excellent water resistance, their painted surfaces can be washed with detergents. Such compositions are the most expensive among similar products.
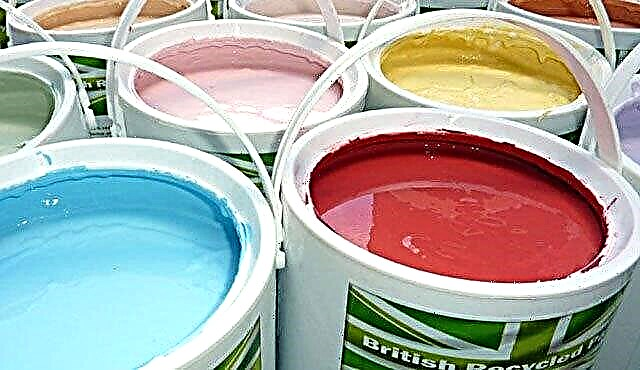
To determine which whitewash is best for the ceiling, you need to carefully read the label on which the purpose of the composition, the consumption per “square” of the area, and other important information are needed before buying a water-based paint.
Properly selected composition allows you to create a long-lasting snow-white ceiling coating - it will not turn yellow over time and will be reliably protected from the appearance of fungus.
Whitening with water based paint
Before whitening ceilings, applying a water emulsion over lime, the previous layer should be pre-coated with an acrylic primer. Then it doesn’t hurt to make sure the surface is strong, for this you can try to scratch it.
Paint is applied only when the ceiling does not crumble. When painting over chalk, there is no need to prepare. The water-based composition will be held on the ceiling without the use of a primer.
Before starting repairs, you should prepare the room. Items in it are carefully covered with foil or taken out of the room to protect them from paint.

A more convenient and simple painting process is the use of a roller, for which they proceed as follows:
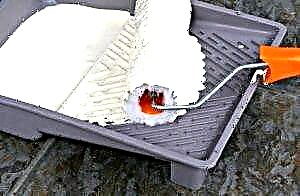
- Paint is poured into the paint tray.
- A roller is dipped into a container and rolled on the inclined side of the bath so that the paint is evenly distributed on the surface, and its excess is drained.
- The first layer is laid perpendicular to the window openings.
- Wait for the paint to dry completely.
- After this, the next layer is applied, placing it parallel to the windows.
- Using a brush, paint over sections of the ceiling at the junction of the ceiling with the walls.
Spray paint is much easier. It is necessary to put three layers, without having to follow the direction of the painting. The main thing is not to miss a single centimeter of the ceiling surface.
Chalk repair
Before you make a ceiling with whitewashing, you should prepare a chalk solution, for which 10 grams of wood glue and 5 kilograms of chalk will be required. Its consistency should be such that the composition does not drain off the knife. If not, add chalk. You can pour blue in the mixture so that the surface turns out to be snow-white, without yellowness.
The technology for repairing the ceiling with chalk does not differ from the process of applying water-based paint. First, choose a tool for repair - brush, roller or spray. The composition should lie down in an even layer.
Glue whitewash of the ceiling, quite popular today, which has glue in its composition, it is much easier to apply and holds more firmly. If the surface covered with simple chalk on contact can get your hands dirty, then glue painting has no such drawbacks. In addition, such a whitewash can be given any color shade.
Preparation before whitewashing
Before you whitewash the ceiling, you need to prepare the space and surface that you are going to whitewash. To do this, free the room from furniture. If there is no way to remove all the furniture from the room, it is necessary to cover it with building plastic wrap so as not to spoil it with splashes.
Cleaning the ceiling before whitewashing
 Next, proceed to cleaning the ceiling. If you are going to whitewash the ceiling with the same composition that it was previously coated with, and your ceiling does not require additional processing, then you will only need to clean it of cobwebs and other dust. To do this, just walk with a damp cloth in the corners.
It is important to know that if your ceiling was previously whitewashed with chalk, then only chalk will lie on it, and in order to put another composition on it, a thorough cleaning of the surface is necessary.
If your ceiling was previously covered with lime, then lime and chalky whitewash fall perfectly on it.
But, in any case, many professionals advise removing the old whitewash before applying a new one.
How to repair cracks
After you have removed the old layer, inspect your ceiling. All bumps and cracks, if any, are best covered. If the cracks are large, then it is not enough just to cover them with putty.
 Large cracks inside contain air, and, after the putty dries, the air can again go outside and disrupt the integrity of the putty. To prevent this from happening, large cracks are first glued with a speck. This is a roll of mesh 3-5 cm wide, one side of which is already treated with glue. We glue it on the crack and cover it with putty. Only in this case, the crack will not appear again. After drying, grind the bumps with sandpaper.
Whitewashing tools
So we have completed the preparatory work necessary before whitewashing. Now you can safely take on the painting.
To do this, you will need:
- Whitening roller with a width of 22 - 25 cm with a fur coat with a medium pile. Too short or long pile on the roller can leave unnecessary spots and stains on the ceiling, which is undesirable for us. Whitening with a roller is preferable to brushing. The process of whitewashing with a brush is longer and laborious, some skill is needed. And whitewash roller can handle any person even without a lack of experience.
- Primer roller. Characteristics are the same as for whitewashing. Important: do not prime and whiten with the same roller.
- A narrow brush with a width of 5-7 cm. We will need it for painting corners and inaccessible places for the roller.
- Plastic cuvette. This is an inclined bath for uniform distribution of paint on the roller. When purchasing such a cuvette, make sure that its width matches the width of the roller.
- Telescopic handle for the roller. With it, you can whitewash the ceiling, standing on the floor, without using a stepladder. But for corners and inaccessible places you still have to use a ladder or a table.
- Step-ladder (a regular table is also suitable).
- Rubber gloves.
- Old newspapers, rags.

How to primer the ceiling
So that our paint fits tightly and well on the ceiling, it must be primed before whitening.
A primer is a white liquid designed to better bond various materials. Manufacturers produce ready-made mixes in large plastic cans. Pour this liquid into the cuvette, lower the roller and apply to our surfaces.
It is impossible to apply a primer and whitewash the ceiling with the same roller.
Since the primer is an adhesive-based compound, all drops and splashes that may occur on the floor and other places must be removed immediately. Because after drying, removing the primer from the floor will be much more difficult. To do this, prepare a bucket of water and a mop with a rag so that you can immediately wash off the primer drops after they appear.
After application, let the primer dry. The manufacturer usually writes on the container how long it takes for the primer to dry. Usually this is a few hours.
How to whiten the ceiling
Now we are ready to start whitewashing. To date, whitewashing with water-based paints is the most convenient and preferred. There is no more pleasant material for work. Therefore, here we consider the option of whitewashing namely with water-based paint.
Here are some of the benefits of using a water based paint:
- The surface is smoother and white than from lime.
- The coating is more durable and there is no need for multi-layer staining.
- The mixture is already ready for use. There is no need to mess with the dilution of the chalk solution or to extinguish the lime yourself. Hence the absence of dust, dirt, debris, and odor.
There are many varieties of water-based paints: acrylic, latex, alkyd. How to use these mixtures, the manufacturer usually writes on the packaging.
How to whitewash the ceiling
Getting to the painting. Along the perimeter of the room, paint the joints between the walls and the ceiling with a brush, or ceiling skirtings (whoever has them). 
Now we pour our paint into the cuvette, wet the roller in it and roll it along the inclined side of the cuvette to evenly distribute and remove excess paint. Now we begin to paint the ceiling with a roller in one direction, moving from window to door.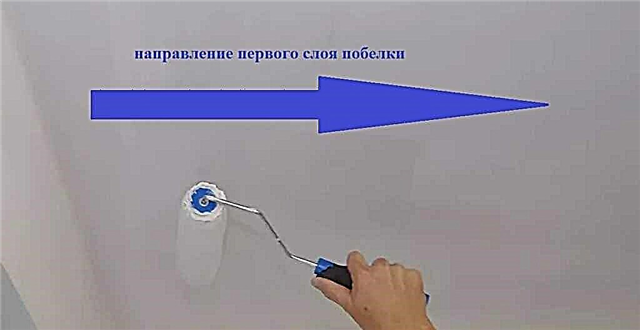
It is recommended to use additional additional artificial lighting, which allows you to see and correct all the deficiencies in time.
It is very important to perform whitewashing with closed windows and windows, so that there are no drafts, otherwise our whitewashing can go in stripes.
You need to whiten it in parallel stripes, while the new strip should overlap, that is, slightly step on the previous one (3-5 cm). This is necessary in order to completely paint the surface, and it did not look striped after drying. The entire surface from the beginning of the room to the end should be painted quickly, without stopping. Otherwise, unnecessary stripes may occur to us. With the first layer we are done. Now let it dry. The manufacturer also writes the drying time on the packaging, usually from one hour.
If necessary, make a second layer. In this case, our strokes should be directed perpendicular to the previous layer. That is, if the first time you painted from window to door, then you put a new layer from wall to wall.
This technique will allow you to achieve uniform staining of the ceiling, without stripes and stains.
In conclusion, it remains to wish you success, because whitewashing the ceiling is an action that even a beginner can carry out independently. The main thing is to have a desire and follow the instructions.
How to prepare a ceiling for whitewashing
The final result directly depends on how correctly the ceiling surface is prepared for applying whitewash. In some cases, in order to whitewash the ceiling correctly, it is not necessary to even wash off or peel off the old whitewash to concrete or plastered brick.
The preparation process consists of three to four stages, depending on the condition of the ceiling and the presence of the old finish layer:
- We determine what exactly the whitewashing of the ceiling, materials, layer thickness, the presence of defective spots, rust, fungus,
- We erase or clean the old layer of decorative coating to concrete or stone foundation,
- Using a brush and an aqueous solution, we wash and remove the remnants of the whitewash mass that has eaten into the pores of the surface.
In theory, you can’t wait until the covered ceiling is completely dry, it will be enough to wait for the average degree of drying, when there are no more wet spots, and the surface has turned a little darker than that of dry concrete.
An exception is a surface affected by rust spots or fungal deposits. Usually, in such a situation, treatment is performed with copper sulfate or a special treating agent. In this case, it is important to wait for the final drying of the applied solution in order to determine the missing places and evaluate how much it was possible to get rid of the rusty coating.
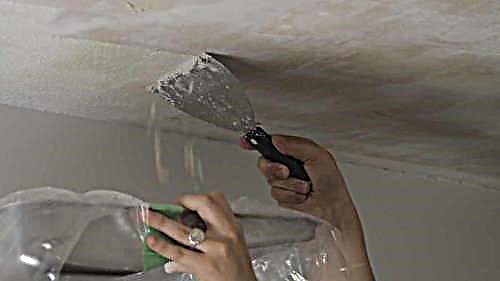
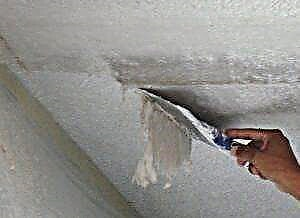
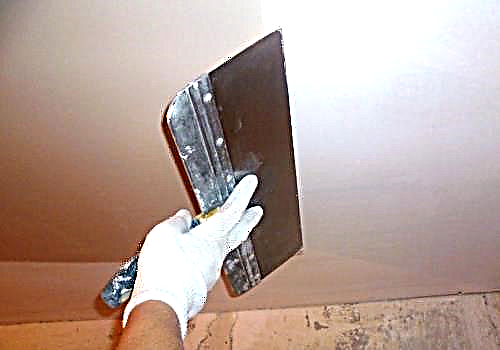
The edge of the spatula should not be sharp, otherwise you can make holes
In any case, before whitewashing the ceiling with your own hands, in order to get a good quality decorative coating, the masters recommend stripping chalk or lime, as they say, to the root. This ensures an even uniform layer of new whitewash, without lumps of adhering dust and traces of stains left from the brush.
To determine what exactly is on the ceiling, you can use a clean cloth. If it is carried out over the chalk, then traces from the chalk coating will remain on the fabric surface, from lime whitewash, as a rule, nothing remains on the rag.
Preparing a new ceiling surface for whitewashing
It would seem that the simplest option is to coat a new clean surface of concrete or plaster. In fact, this is not entirely correct, especially if for sanitary reasons it is necessary to whitewash lime, which adheres very poorly to new surfaces. Even if plaster or concrete, the brick on the ceiling is pre-treated with a primer, which in theory improves the adhesion of the decorative layer to the base.
Therefore, regardless of what exactly it is planned to whitewash the ceiling, its surface must be wiped away from dirt and dust, and this is done in a dry way, without water. As soon as the remnants of cement and all that stuck during the repair or construction of the room are removed, it will be necessary to perform a primer that improves the extrusion of microbubbles of air that are stuck on the concrete surface.
To do this, mix a small amount of warm water with liquid soap or detergent, a ratio of 1:50. A small amount of edible salt is added to the resulting solution. It is believed that salt is a guarantee that the organic matter left over from liquid soap will not impede the wetting of the ceiling surface with a lime or soap solution.
The "empty" whitewash of the ceiling with your own hands helps a lot. This is a method in which the surface of the ceiling is cleaned with a stiff brush with plastic bristles with ordinary water with a small addition of PVA. As a result, sand, particles of cement, all dirt and dust are washed off, even before the soil is applied. The next step is to treat the concrete surface with iron sulphate, and only after the drying of the mordant is it necessary to apply the soil.
Lime white for the ceiling
Everyone who has ever whitened at least a small portion of a wall or ceiling with lime mortar knows how whimsical and inconvenient lime is to work with, even if soap or glue is added to the solution.
Lime the ceiling makes sense for sanitary purposes, for example, in the bathroom. The second option, if the neighbors from above have a bad habit of not repairing sewer pipes, as a result of which spots regularly appear on the ceiling.
In addition, you need to understand that the process itself whitewash requires more effort and time. It will take twice as much effort to remove the old coating of lime.
What else whitewash the ceiling in the apartment
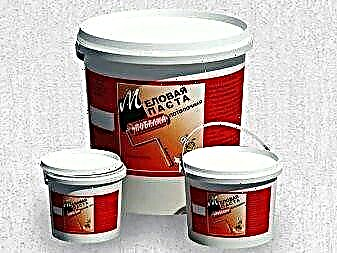
An alternative to lime and chalk solution is the use of ready-made pasta and chalk paints. This is not to say that they are very different from ordinary chalk, but, as practice shows, it is much easier to whiten such a composition than a home-made mixture. In addition, it is possible to tint or buy ready-made painted material that does not fade, unlike blue, in the sun, and perfectly masks yellowness and brown house dust.

Better to buy special material
The better to whitewash the ceiling
The apartment will be safer if you whitewash the ceiling surface with finished chalk paste. Of course, chalk does not give the whiteness that can be obtained by using lime, but the prospect of inhaling calcined dust is not very pleasing.Moreover, approximately 10% of people living in apartments have an allergic reaction to lime.
The chalk is less resistant, but it does not have special requirements. Traditionally, they tried to chalk the kitchen and places for relaxation. If spots of unknown origin appear, then perhaps the best option would be to use Cretaceous whitewash with the addition of volatile ammonia compounds. The smell of such material is not particularly pleasing, but, as a rule, the disinfecting aroma disappears after a day, and the coating itself eats up all the microflora on the ceiling surface, remaining white for many months.
How to whitewash the ceiling
The most correct way to whiten the ceiling surface is to use a sufficiently liquid solution that penetrates well into microcracks and pores. This method remains more time-consuming, requires accuracy and attention Since the missed areas on the ceiling will instantly light up after drying.
Chalk or lime is applied in at least two layers.
How to make whitewash for the ceiling
You can lime the ceiling plate in two ways, either well or quickly. Usually recommend at least 2 kg of slaked lime per 5 liters of water. It turns out a very thick paste-like mixture, in which 30 g of laundry soap and the same amount of office silicate glue are added. The mass is ground to a state of liquid kefir. In order to whiten such a mixture, serious physical effort is required, but the result is worth it.
The whitewashing process is as follows:
- The ceiling is abundantly moistened and soaked with water,
- Liquid lime mass is applied to the ceiling and stretched with a spatula and a stiff brush,
- After 10-15 minutes, according to the laid mass, it is necessary to whiten the lime solution diluted in half.
The result is a very uniform, spotless, smooth and dense surface. Next time it will be possible to whiten in 2-3 years.

Kneading should be done 3-4 hours before work
How to whiten the ceiling with the first layer
If you use a standard batch of 1.7 kg of lime per 10 liters of water, then you will have to whitewash at least two, or even three times, depending on the quality of the concrete ceiling. It is necessary to moisten the ceiling before whitewashing moderately, there is so much water in the solution itself, and its excess adversely affects the quality of work.
The first layer is applied with a roller or brush-mowler. Despite the liquid solution, lime also needs to be rubbed into the ceiling, otherwise the first layer will not adhere to concrete. It will not work to whitewash with a pneumatic sprayer or a brush-knot; all the lime will be on the floor of the room.
On the old whitewash, I rub the lime with a spatula
How to breed chalk for whitewashing the ceiling
To dilute the chalk solution, you need 10 liters of pure water and 3 kg of chalk powder. Kneading is performed in the following way:
- 25-25 ml of blue is diluted in water, a small amount of PVA is added,
- Chalk is poured into small portions of 100-150 g and thoroughly mixed with a wide mixer, you can use an ordinary wooden spatula.
After 10 minutes, you can whitewash the ceiling with the first layer.
Conclusion
It is best to chalk the ceiling with a pneumatic spray gun. True, for this you will have to climb the stairs to the very ceiling and direct the stream at a very sharp angle of 15-20 ° to the surface. Not very convenient, but it turns out a very uniform surface, without streaks, and there is a real opportunity to whiten the ceiling in a couple of hours of work, even if the material is laid in 2-3 layers.
Lime whitewash
To prepare the mortar for painting the ceiling surface, take 2.5 kilograms of lime, add 100 grams of salt soaked in water in advance, as well as a little blue. All components are mixed, and water is poured in such a way that as a result, the volume of the mixture is approximately 10 liters.

The rules for how to whitewash the ceiling with lime are similar to the recommendations on how to apply water-based paint and chalk solution.
Important Nuances
When repairing the ceiling surface, the purpose of the room should be taken into account. For example, if it is a bathroom, the use of a special composition that is resistant to high humidity and able to protect the ceiling from fungus is required. Otherwise, the paint will lose its attractive appearance within a short time and, most likely, will begin to crumble.
When carrying out painting work, safety must be kept in mind, since whitewash must not be allowed to enter the respiratory system, eyes or skin. To do this, use a respirator, rubber gloves and special glasses. The fact is that the coloring composition can cause serious allergic reactions, and sometimes chemical burns.
Removing old whitewash from the ceiling
Despite the fact that there is a technology on how to whitewash the ceiling with your own hands without washing off the previous layer, to obtain a high-quality result, you need to clean the surface and be sure to level it.
Be sure to wash off the previously applied whitewash, poorly kept on the ceiling. If you do not remove it, you cannot count on a decent result. When the chalk or lime layer is even, thin and holds firmly, painting can be done on top of it.

In the event that preparation of the ceiling for whitewashing is nevertheless required in order to remove chalk, proceed as follows:
- A foam sponge is moistened in water so that it becomes wet and drops do not drip from it.
- Over and over, they draw it over the surface, thereby washing off layer by layer, wetting it as often as possible.
- Finally, wipe the ceiling with a wet rag, often dipping it in water.
As for the lime layer, it is much more difficult to remove it:
- First of all, moisten the entire ceiling surface, for which you can use a spray bottle.
- Soaked material is removed with a scraper or spatula.
- Then they carefully wash the ceiling with a sponge or rag to eliminate dust and lime.
It is better to do the work in sections: while wet lime is removed from one of them, the surface of the other absorbs moisture. As a result, you can prepare the ceiling faster. Also, to wash off the old whitewash, they use special means.
In building materials stores, a wash is sold, which is applied with a spray. After it dries, a crust forms on the ceiling, it must be removed with a scraper. Finally, the surface is washed with a rag.
There is another option for removing the old layer. Vinegar is added to the water in the amount of one tablespoon per 5 liters and 50 milliliters of bath foam. The components are thoroughly mixed and applied to the ceiling. After 20 minutes, it is cleaned with a scraper and wiped with a wet cloth.
There is another way to clean old whitewash. Mix water and flour. The resulting paste is applied to the surface and allowed to dry, after which it will not be difficult to remove the old layer.
Professional ceiling painting
If you do not have enough skills and knowledge on how to whitewash ceilings, you can use the services of professionals. This solution has many advantages. It allows not only to save time, but also to get an excellent result. A professional will spend a minimum of painting composition on whitewashing the ceiling, so repairs will not cost much more than self-painting. The main thing to pay attention to is the skill of those who are to be hired.

It must be remembered that whitewashing on old paint is an inexpensive and easy way to transform the interior of the room for the better. It should not always be used, and only when the previous layer is even and excellent in holding. In this case, water-based paint, and lime, and chalk, applied directly to the old base, will hold firmly.
Whitewashing is easy. Seek help from masters and hire professionals in order to save time if the owner of the premises is a busy person and does not have the opportunity to repair.
What to whiten?
Chalk is often used to whitewash ceiling surfaces. It allows you to give the ceilings an attractive snow-white look. But this is not always convenient, since chalk may soon begin to crumble. As a result, dust is generated in the room. It is not recommended to use chalk on bathroom surfaces, as this material does not have waterproof properties.
Alternatively, lime may be used. Its main advantage is the fight against fungi. Therefore, in those rooms where there is a high chance of the appearance of a fungus, it is better to choose lime as the finishing material. In addition, it has waterproof properties, so it can be used in the bathroom. Other advantages include the ability to hide small cracks and defects in the ceiling.
Among the main disadvantages of lime, it is worth highlighting the possible occurrence of allergic reactions to this material among residents. Another significant drawback is that, compared with chalk, it does not provide an ideal snow-white shade of the surface. In addition, it has a pungent odor and dries for a relatively long time.
In the process of choosing the right material, you should pay attention to the old layer. If it is made on the basis of lime, then chalk for a new layer will not work. If the old layer is treated with chalk, it is undesirable to choose lime for a new whitewash, as there may remain stains that spoil the appearance of the ceiling.
The material of the old finish is quite simple to determine. Just swipe your finger across the surface. If the coating was applied using chalk, then traces of it will remain on the finger. When finishing with lime, fingerprints do not remain.
Sometimes it is advisable to opt for a water-based paint. It will provide a wonderful appearance to the ceiling. Such paint is remarkably applied to the old finish, even if it is made of chalk or lime. Due to its properties, water-based paint will be an excellent solution for finishing work in the bathroom.
When preparing a solution that will be used for whitewashing, glue is usually added. Due to this, the coating durability is significantly improved and its service life is increased.
It is recommended to add carpentry types of glue, which will allow the ceiling to maintain an attractive appearance for as long as possible. You can whitewash the ceiling with snow, and a chalk mixture is often used for the stove.


Consumption
Before performing repairs, it is advisable to calculate the amount of material needed. Experienced professionals can do this pretty quickly. But for beginners, it is quite difficult to calculate the exact amount of materials in advance, since in each specific case this value will be different.
For a preliminary calculation of the consumption of materials should be based on the surface area of the ceiling. It must be borne in mind that whitewashing is carried out in several layers.

When whitewashing with chalk or lime, you will have to prepare special solutions. If water-based paint is used, then it can be purchased at retail outlets ready-made. But it is worth considering that its consumption can be quite high. Therefore, it is advisable to buy paint with a certain margin in order to ensure a uniform shade of the surface.
When calculating the necessary materials, it is necessary to include in the list the materials necessary for preparing the ceiling surface for whitewashing. In the process of preparation, contaminants are removed, and the surface is evened out and cracks are closed.
The preliminary consumption of the mixture for whitewashing can be determined taking into account the area of the ceiling. Per square meter, 0.5 liters of mixture will be required. It is worth remembering that it can be stored for no more than 1.5 days.
How to breed?
First of all, you need to properly dilute the mixture and know all the proportions. To prepare a solution based on chalk, you need 5 liters of water. It is recommended that you take warm water so that the ingredients dissolve in it effectively. 3 kg of chalk should be added to the container with this water. Next, 30 grams of glue is added to the resulting mixture. It is advisable to add a little blue in the solution. This will give the ceiling a more fresh look and get rid of the yellow tint. The recommended amount of blue is from 15 to 20 grams, depending on the desired shade of the ceiling.
To prepare a solution based on lime, you need 2.5 kg of material. Pre lime is diluted with a liter of warm water. Then, 100 grams of salt is added to it, which must first be soaked in a small amount of water. Next, add a little blue on the principle of making a solution of chalk. At the final stage, 10 liters of water are added to the resulting mixture.
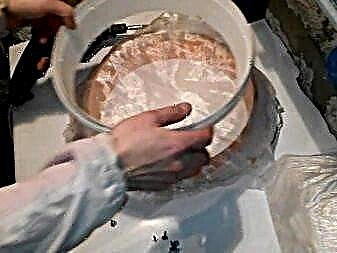
It is advisable to use a construction mixer during the preparation of the mixture. In this case, a more uniform solution structure will be obtained. To determine the desired consistency, just dip a knife or other smooth object into the solution. In the case when, when pulling out a knife, the mixture begins to flow over it, without stopping on the blade, the solution is considered not thick enough. Therefore, you need to add chalk or lime little by little, until the mixture becomes thick enough.
After preparation, the solution must be allowed to brew for 15 minutes, after which it should be filtered with a sieve. Before starting work, the mixture must be mixed again. If you want to give the ceiling a certain color, then you can add suitable pigments to the mixture. You can also use a water-based paint of the desired shade.

Subtleties of work
Making repairs in an apartment is always difficult, but you can just update it. To do this, clean off the old coating on the walls and just whiten them. Such a washout is quite popular today and its price is small.
Before starting work, the surface should be carefully and accurately prepared. Often a new whitewash is applied over the old. But the ideal option would be to clean the ceiling from the old finish with a further leveling of the surface.


To remove the old coating from chalk, you should use a foam sponge. It must be regularly moistened in water and held along the surface of the ceiling. Similarly, you can gradually remove all layers of the old chalk. Then the surface must be wiped with a normal rag, which should also be often moistened in water.
If the old coating consists of lime, then removing it will be a little more difficult. To do this, you first need to wet the surface of the ceiling so that the lime goes limp. To do this, it is recommended to use a spray gun. Then the layers of the old finish are removed with a spatula. At the end of the work, it is recommended to rinse the ceiling surface with a rag to remove any remaining lime and dust.


Now in stores there are special tools for washing off the old whitewash. These products are sprayed onto the ceiling surface using a spray gun. After a while, the surface becomes covered with a crust, which is removed with a scraper. Then the ceiling is washed with a rag or sponge.
You can prepare a tool for removing old whitewash and at home. To do this, you need to dilute a tablespoon of vinegar in 5 liters of water. Next, you need a bath foam in an amount of 50 ml, which is also added to the resulting mixture. Then all this is stirred and applied to the surface. After 20 minutes, the old finish can be easily removed with a scraper, after which the ceiling is washed with a wet rag.


After the old finishing coating is removed in full, it is necessary to clean the surface of the ceiling from dirt and stains.Next, you should conduct a visual inspection of the ceiling for defects in the form of cracks and various recesses. All defective places should be puttied, for which you can independently make putty based on glue.
To prepare the putty, you will need 1 unit of chalk and 2 units of gypsum and glue. All this is mixed in water, after which the resulting mixture should be applied to defective places on the ceiling. When it dries, the surface should be treated with sandpaper. Further, the ceiling surface is subject to priming, which simplifies whitening, and the moisture-proofing characteristics of the ceiling improve. The treated surface should dry for a day.


Whitewashing technology involves two steps. At the first stage, a preliminary layer is applied. In this case, whitewashing should be done in a perpendicular direction with respect to the main light source (usually with respect to windows). The next step is to apply a second layer, which will be parallel to the direction of the rays of light. If necessary, you can apply additional layers. It is worth considering that a new layer is applied only when the previous one is completely dry.
When performing whitewashing, it is advisable to prevent exposure to the surface of drafts or the rays of the sun. This will lead to the fact that soon the material will begin to exfoliate.


Tips & Tricks
Before starting work, it is recommended to remove interior items and furniture from the room. Dimensional objects and other surfaces should be covered with something so as not to stain them during the whitewashing process. If there is tile on the walls, then you can not cover it. At the end of the work, it can be easily washed from contamination.
Before you start whitewashing, it is advisable to put on gloves on your hands and cover your head with a hat. Eyes are recommended to wear safety glasses. It is sometimes advisable to use a respirator. If these safety measures are not used, the mixture can get on the skin and mucous membranes, causing allergic reactions or a chemical burn.


During whitewashing, it is advisable to periodically change the lighting. First you need to whiten in natural light, and after a while to carry out work under artificial lighting. Thanks to this, it is possible to quickly identify possible shortcomings and make the necessary adjustments.
In the absence of experience in whitewashing ceilings, it is better to perform work with a roller. It will provide the best whitewashing results. At the same time, the process itself will be more convenient, simpler and faster. To move a brush or roller on the surface should be confident and even. In this case, the highest quality of work will be ensured.
It is recommended to divide the ceiling into separate strips along which whitewash layers will be applied. At lane junctions, overlaps are performed. This technology will prevent the appearance of unpainted places.

When the work is finished, it is advisable to wipe all stains from whitewashing on the walls or floor with a rag. But sweeping is not recommended until the surface of the ceiling dries. Otherwise, the dust will rise and settle on it, resulting in dark spots. If you perform all the work correctly in compliance with all the above tips, then the next time you will need to whitewash the ceiling no earlier than three years later.
See how to make a spray gun for whitewashing the ceiling from a vacuum cleaner yourself.